SSO with Google Workspace
Firezone integrates with Google Workspace using a custom connector that supports both authentication and directory sync. Use this guide if you're looking to setup SSO with Google Workspace for your Firezone account and optionally sync users, groups, and organizational units from Google Workspace to Firezone.
Directory sync is supported for the Enterprise plan only.
Overview
The Firezone Google Workspace connector integrates with Google's OAuth and identity APIs to support user authentication and directory sync.
On Enteprise plans, users, groups, and organizational units are synced every few minutes to ensure that your Firezone account remains up-to-date with the latest identity data from Google Workspace. Read more about how sync works.
Setup
Setting up the Google Workspace connector is similar to the process of setting up a universal OIDC connector for any other provider. The main difference is the addition of a few extra read-only scopes needed to enable sync.
Follow the steps below to setup the Google Workspace connector.
Step 1: Create a new project in Google Cloud
You may skip this step and proceed directly to Step 2 if you already have a GCP project you'd like to use with Firezone.
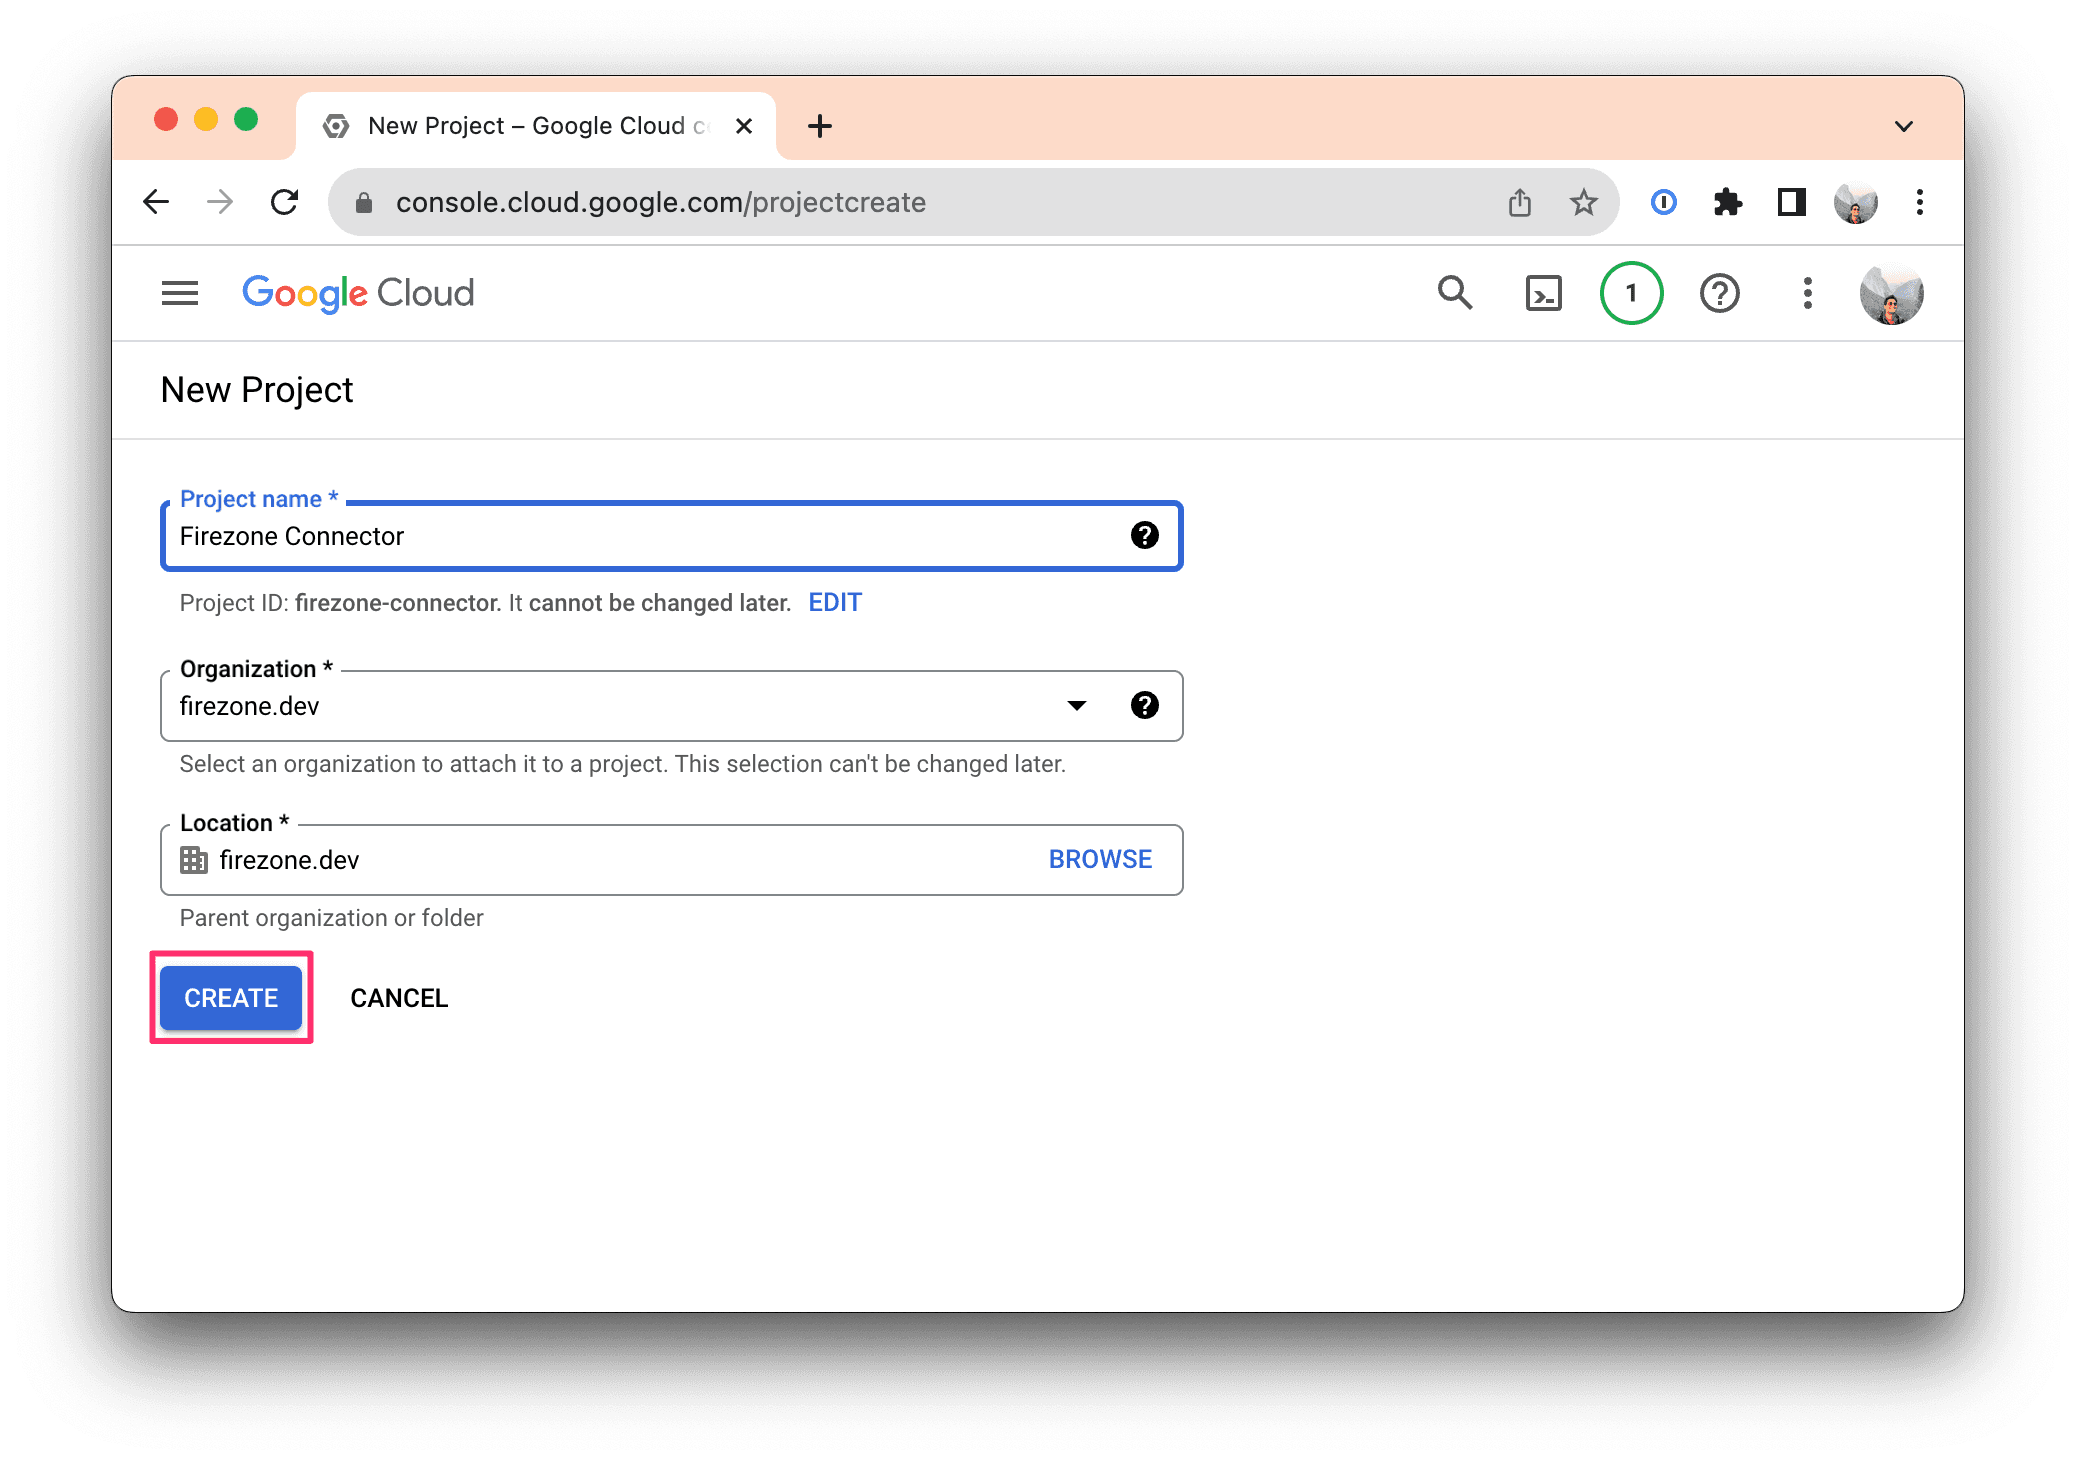
Go here to create a new project in your Google Cloud account and fill in the following fields:
- Project name:
Firezone Connector - Organization: Select the appropriate organization that contains the users and groups you wish to integrate with Firezone.
- Location: Select the appropriate organization to place this project under.
Click CREATE after you've filled in the fields above.
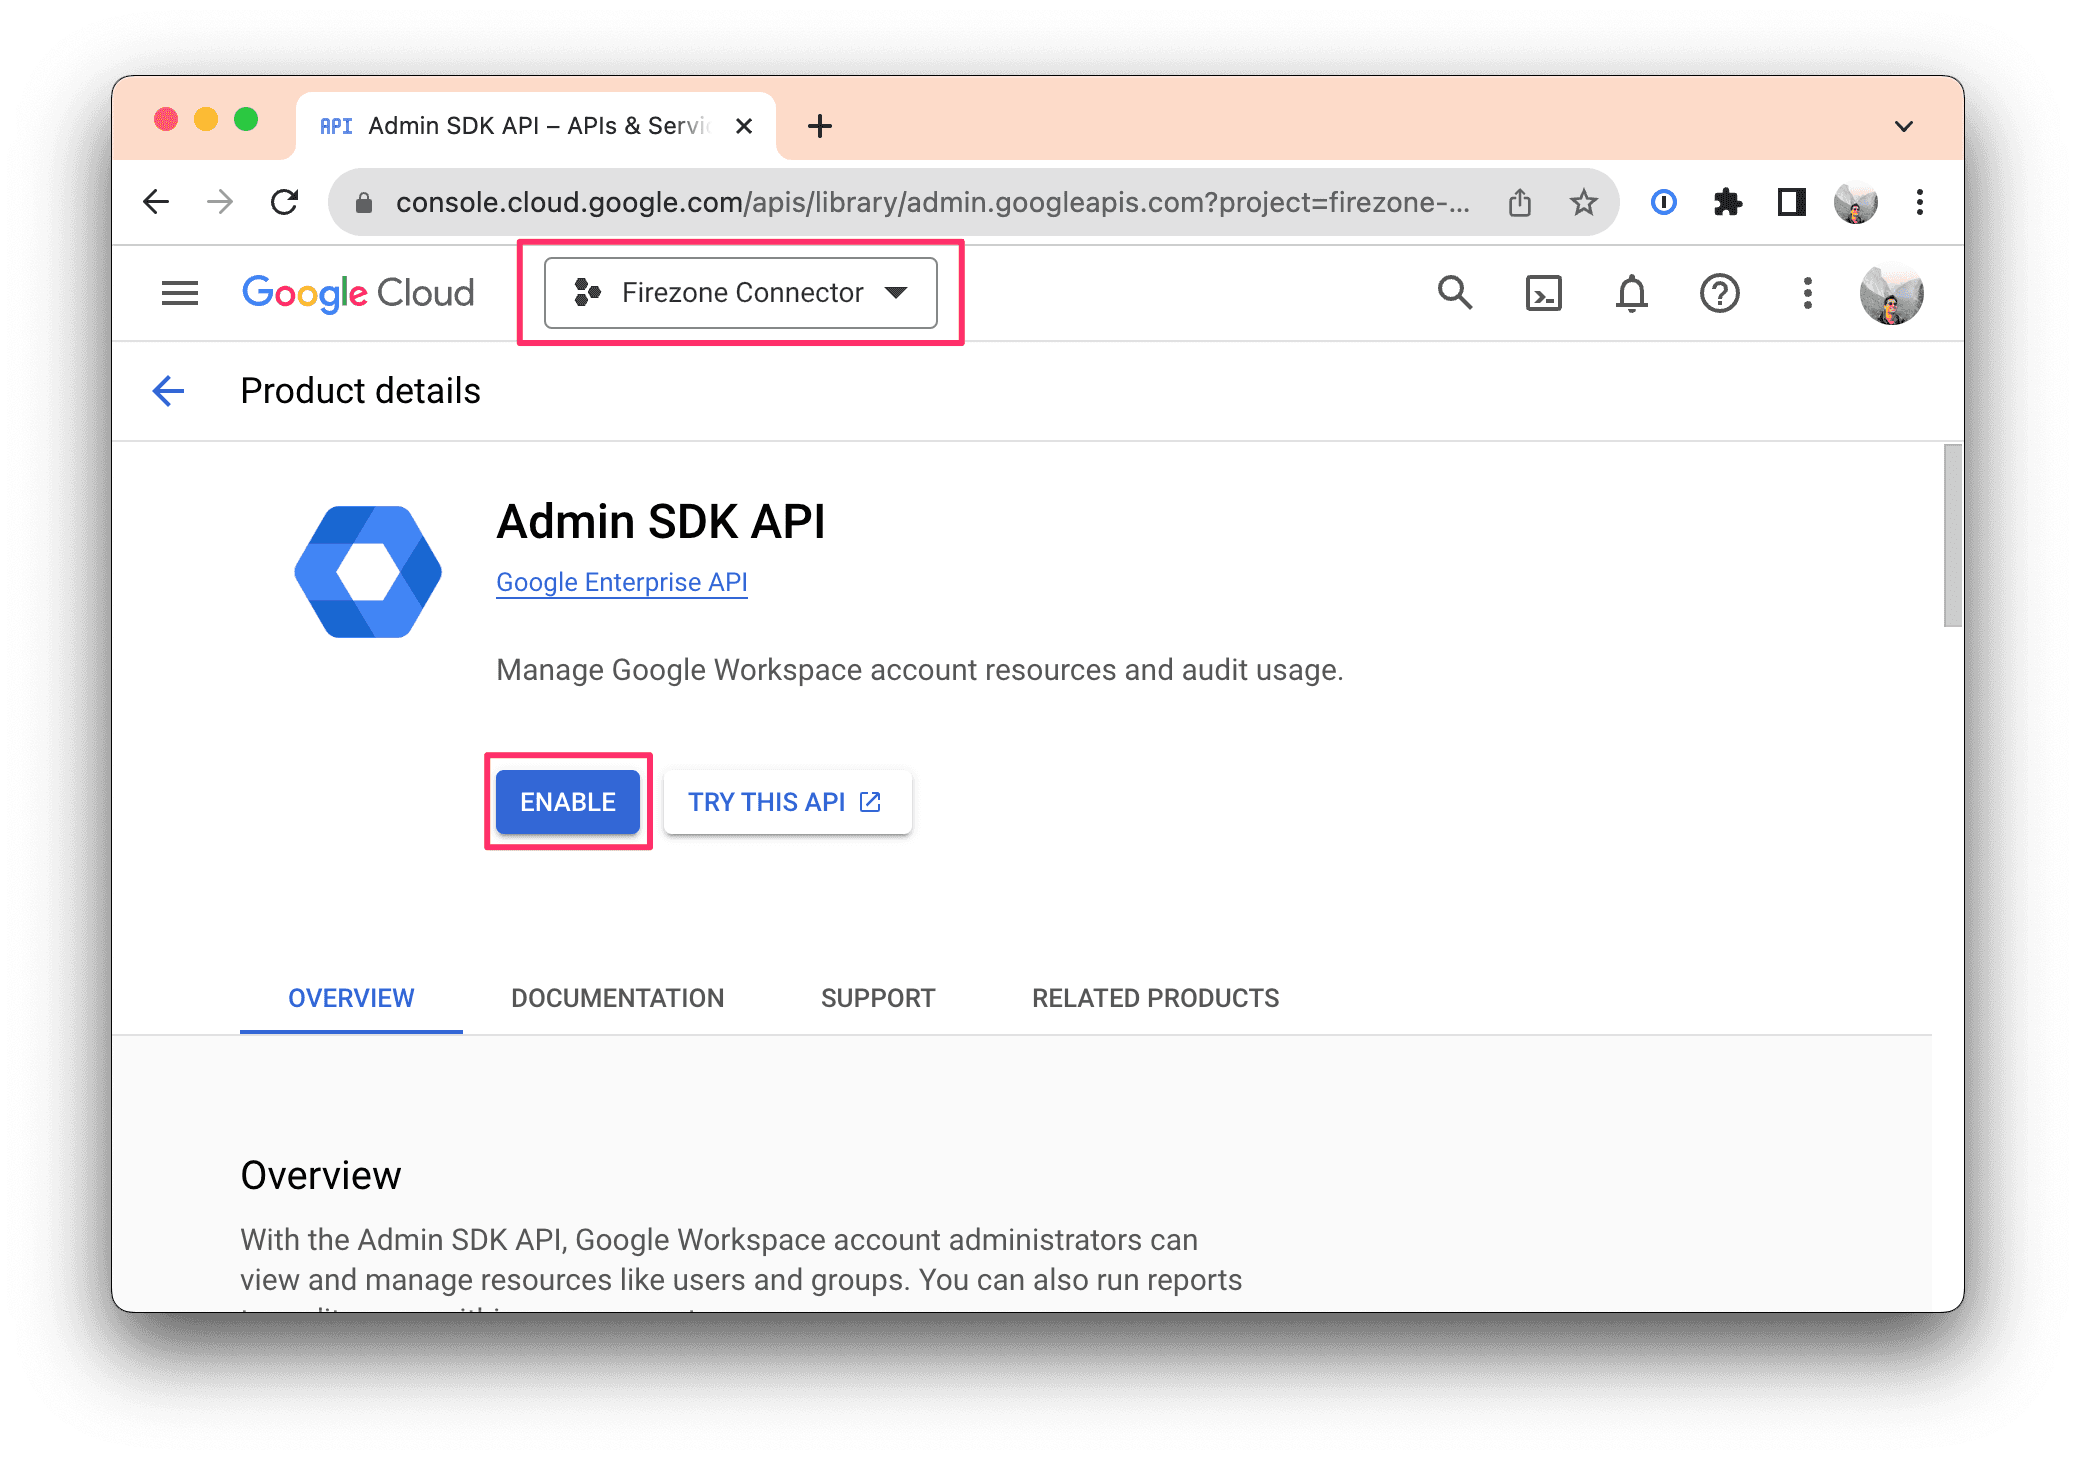
If you're on the Enterprise plan, visit this link to enable the Admin SDK API for the project you just created in Step 1.
If not, skip ahead to Step 3.
This is used to allow Firezone to read users, groups and organizational units from your Google Workspace account.
Important: Ensure the Firezone Connector project you created in Step 1 is selected before clicking the "ENABLE" button.
Step 3: Configure the OAuth consent screen
Click here to configure the OAuth consent screen for the project you created in Step 1.
Important: Select "Internal" for User type. Select "External" may allow external users to login to your Firezone account.
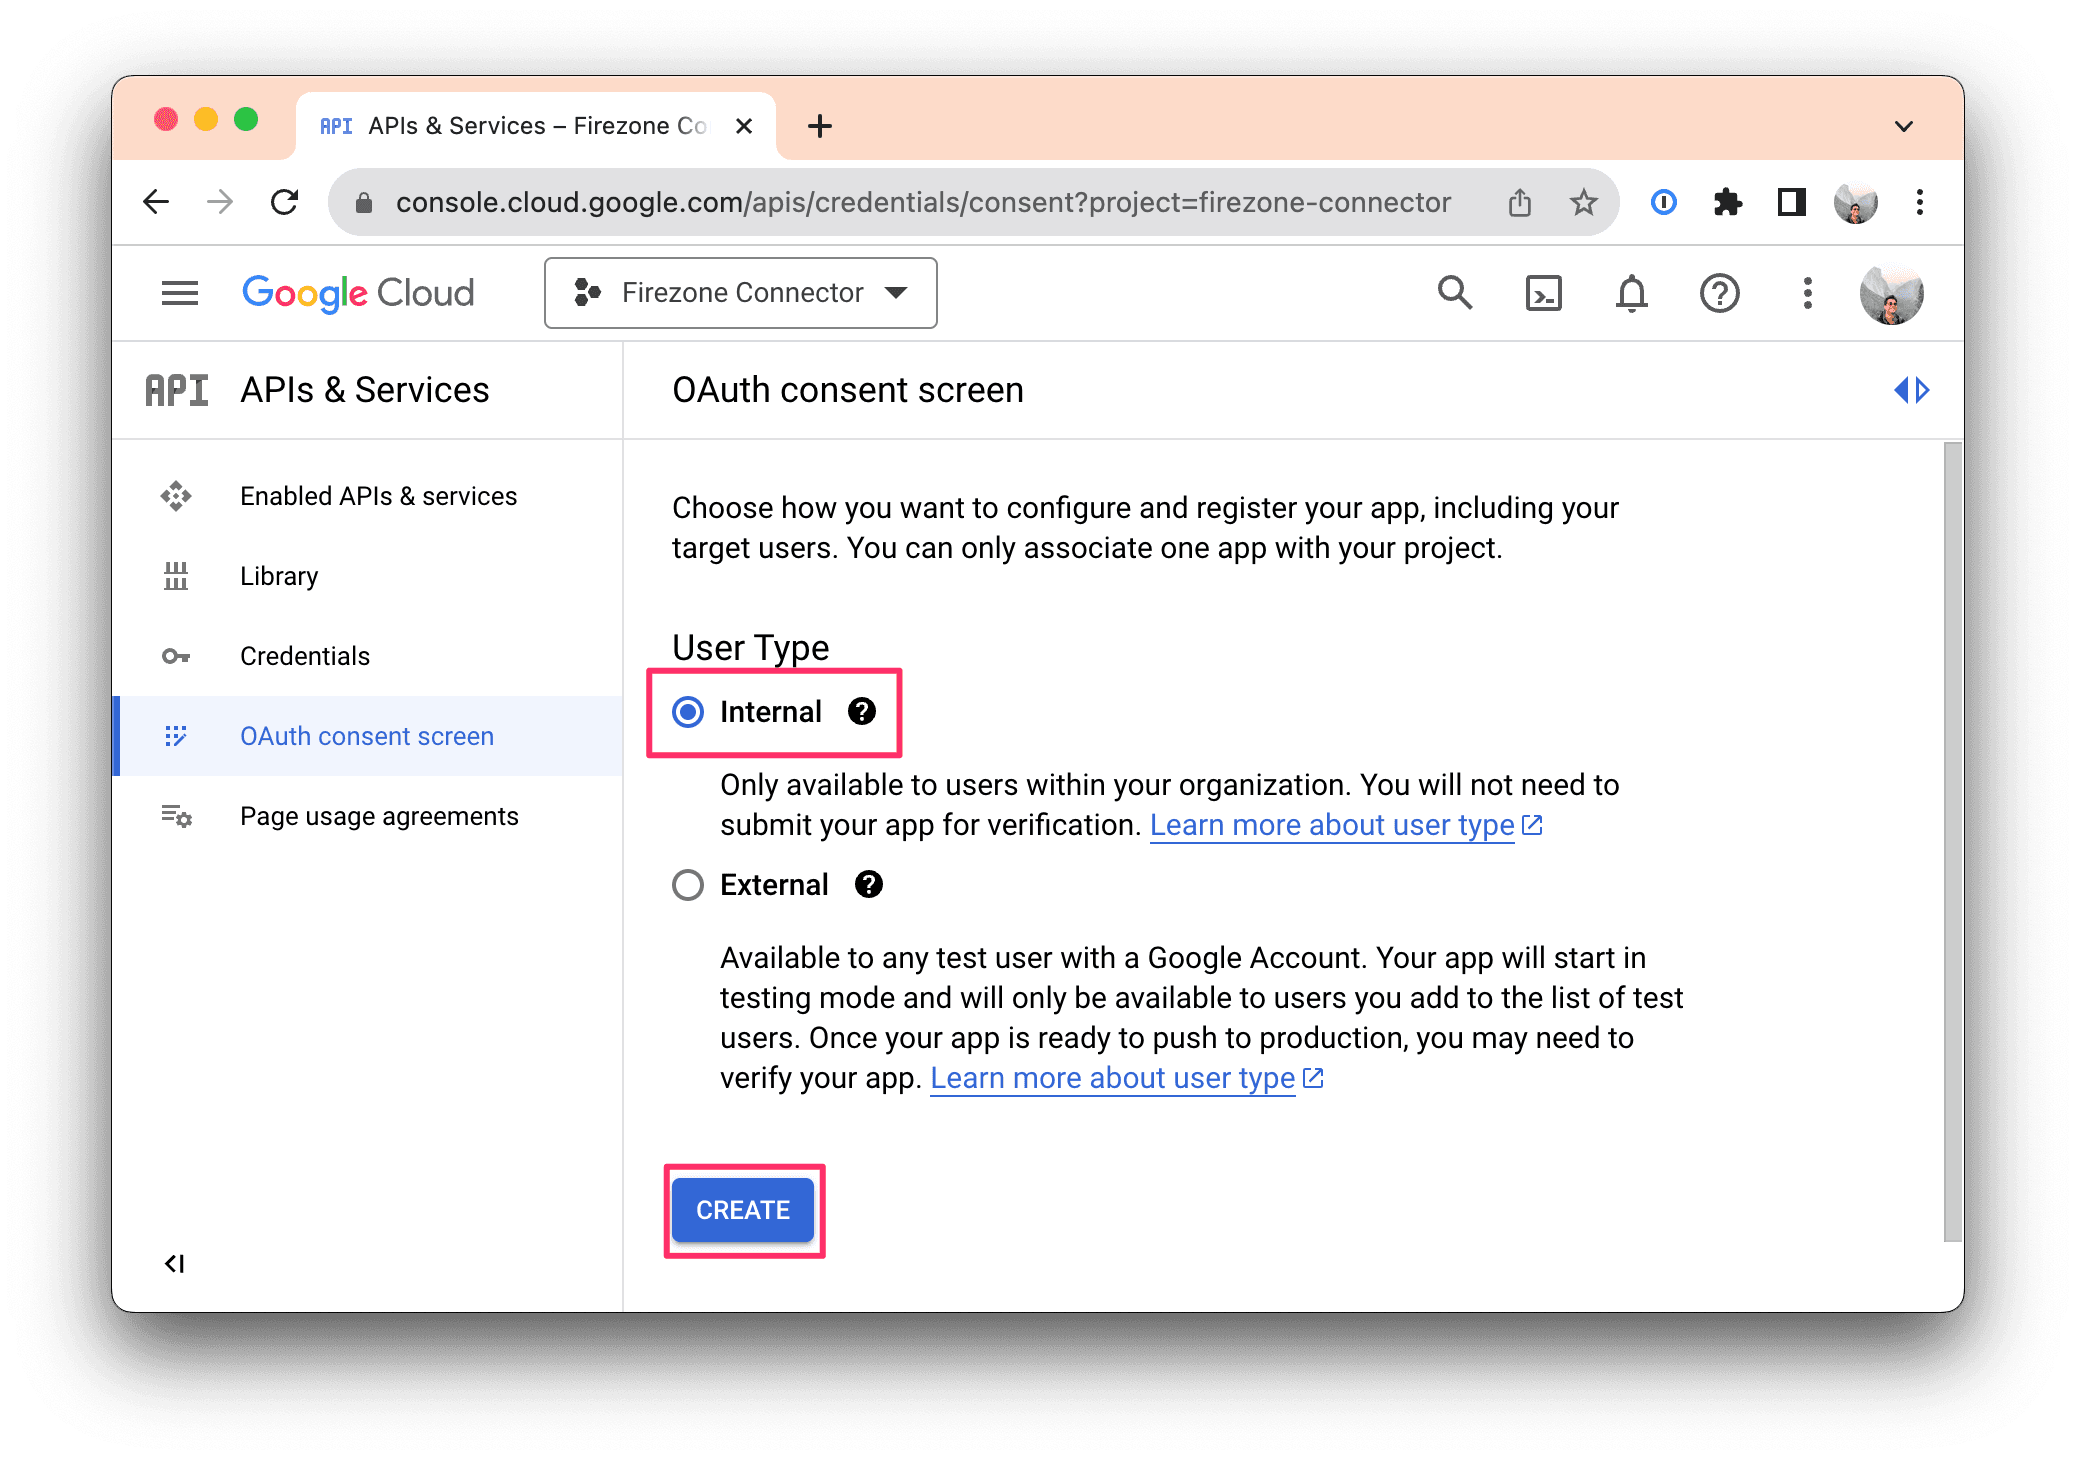
Click CREATE.
On the next page, enter the following information:
- App name:
Firezone - User support email: Your or your company's IT support email address.
- App logo (optional): Download the Firezone logo here to use for this consent screen.
- Application home page:
https://www.firezone.dev - Application privacy policy link:
https://www.firezone.dev/privacy-policy - Application terms of service link:
https://www.firezone.dev/terms - Authorized domains: Click "ADD DOMAIN" and enter
firezone.dev - Developer contact information: Enter the same email you used above, e.g.
it-support@company.com
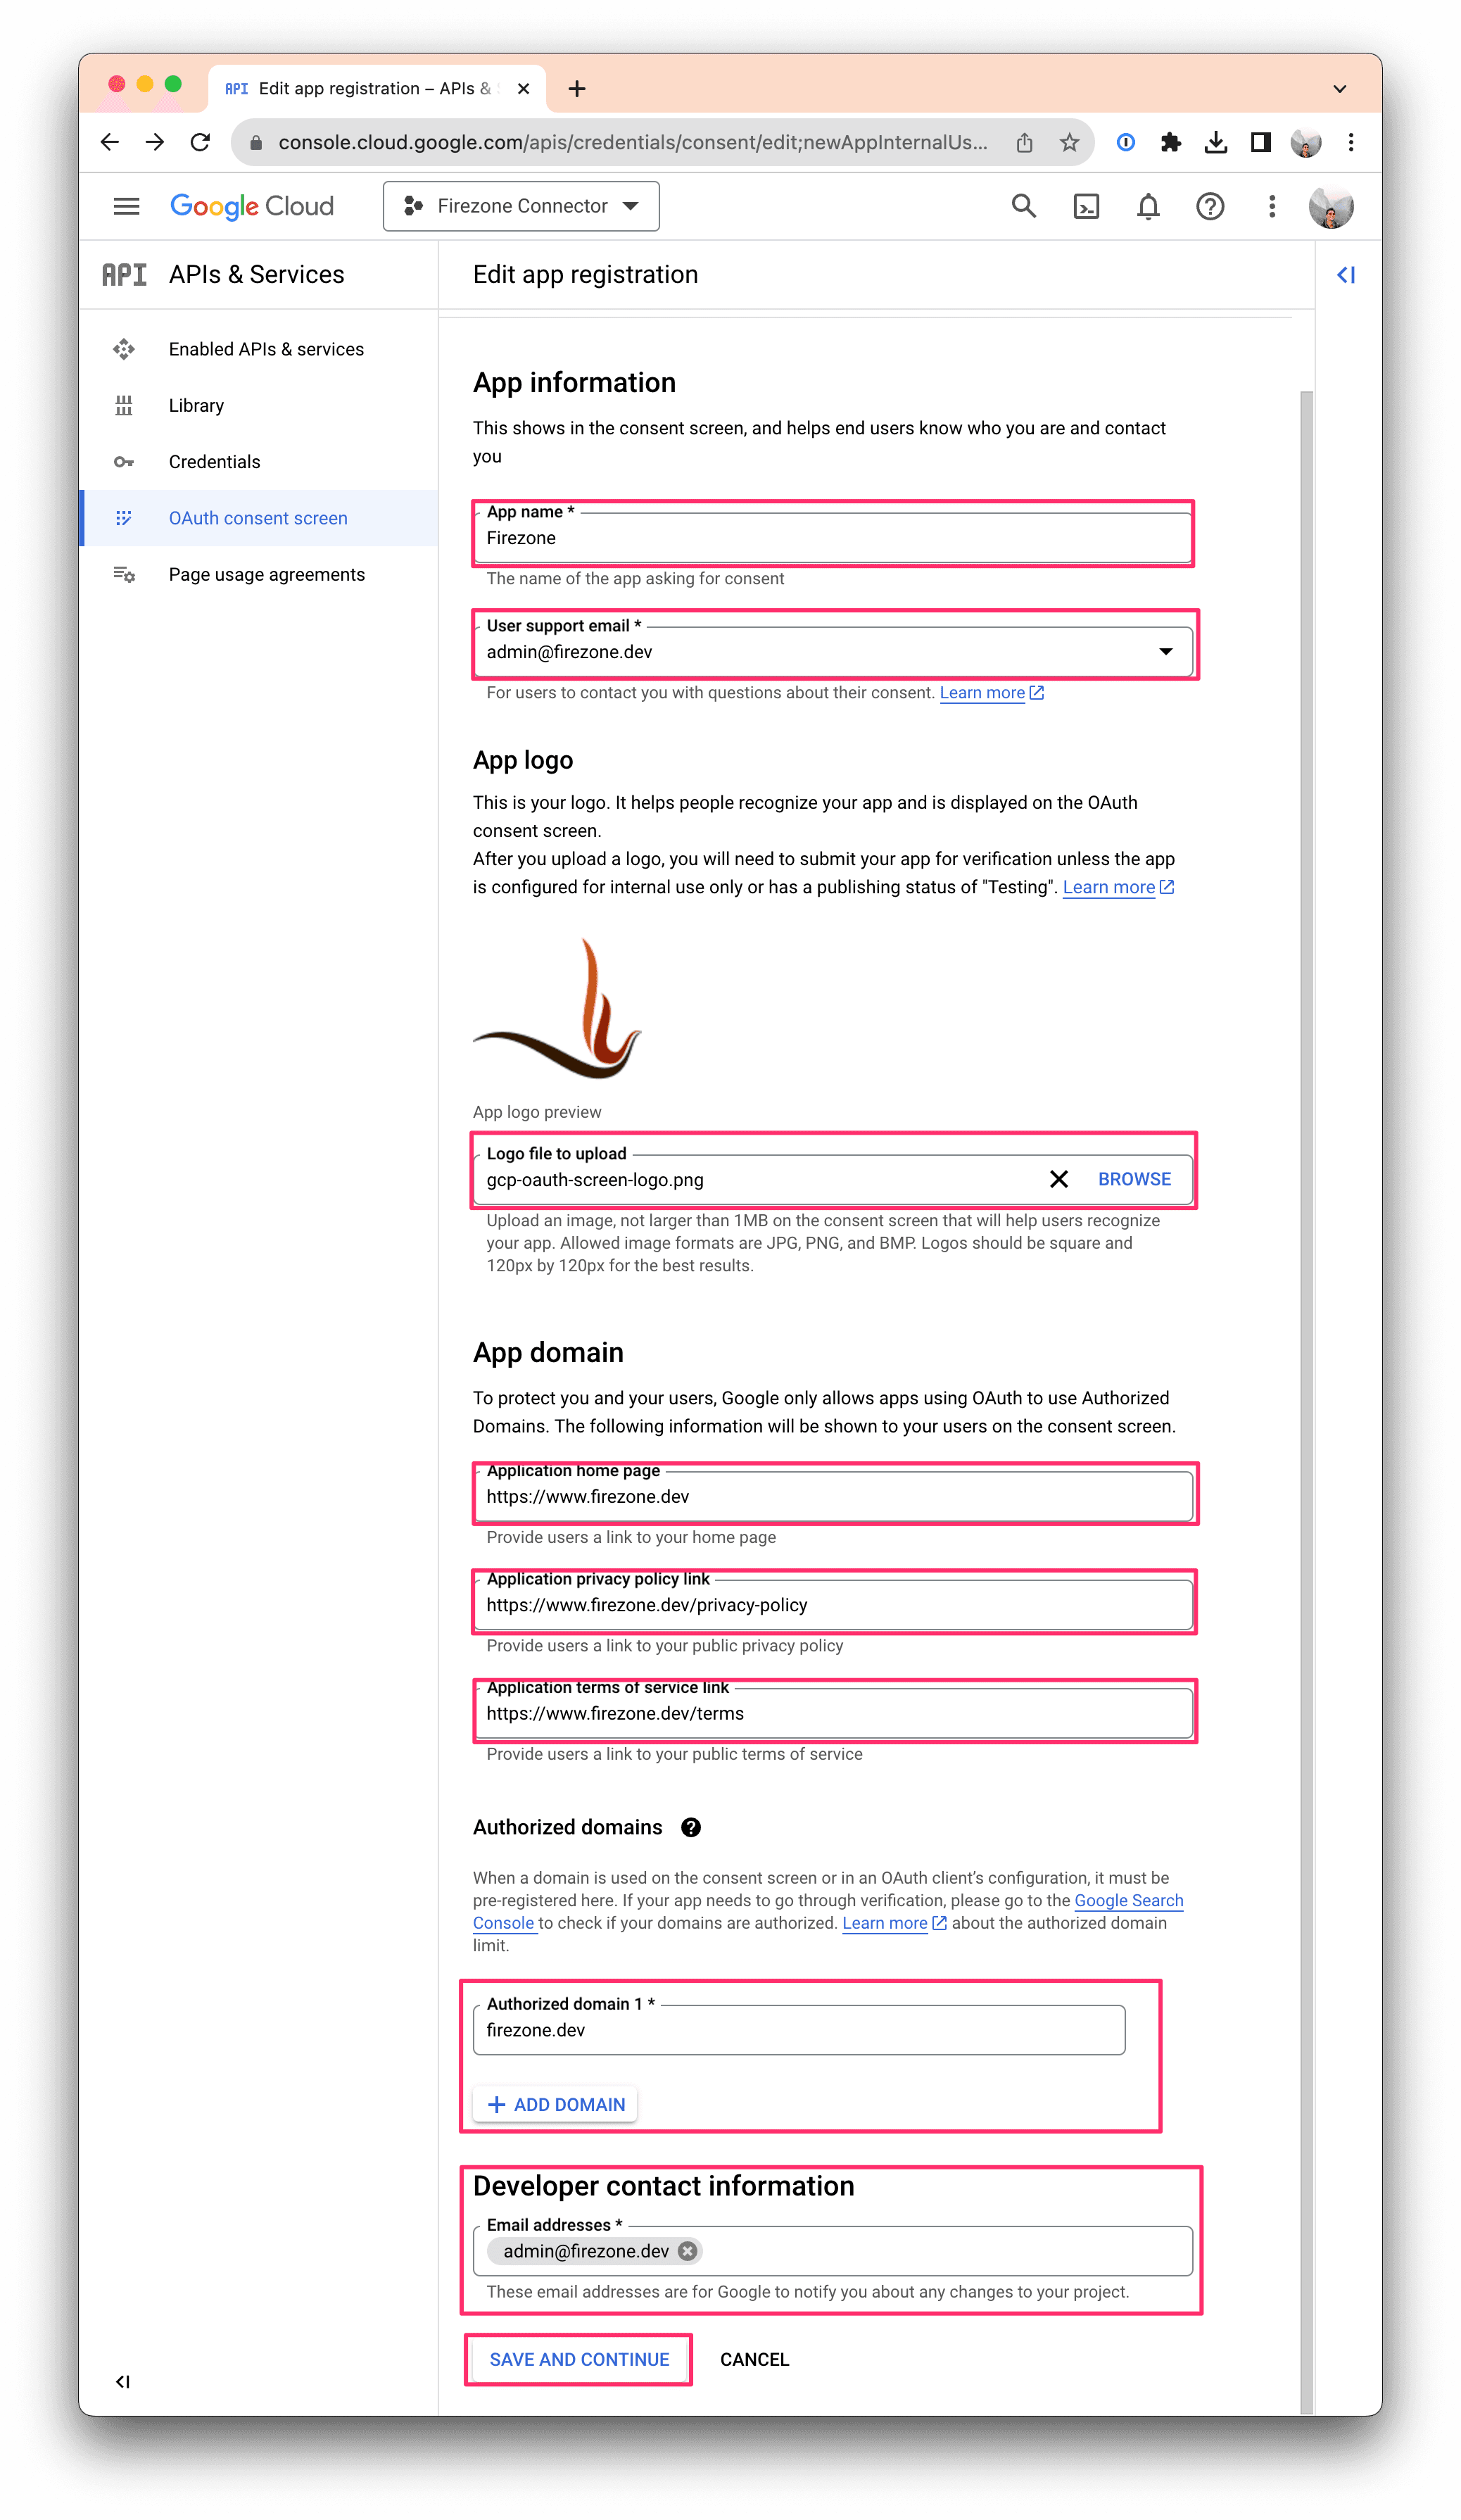
Click SAVE AND CONTINUE.
Step 4: Configure scopes
OAuth scopes determine what information the Firezone connector is allowed to receive when a user authenticates.
Firezone requires the following scopes to authenticate users on all plan levels:
openid: Reserved scope required by all OpenID Connect integrations.profile: Provides information such as the user's username, given name, surname, etc.email: The user's email address.
If you're on the Enterprise plan, you'll need to add the following additional scopes to sync users, groups, and organizational units:
https://www.googleapis.com/auth/admin.directory.orgunit.readonly: Required to sync organizational units.https://www.googleapis.com/auth/admin.directory.group.readonly: Required to sync groups.https://www.googleapis.com/auth/admin.directory.user.readonly: Required to sync users.
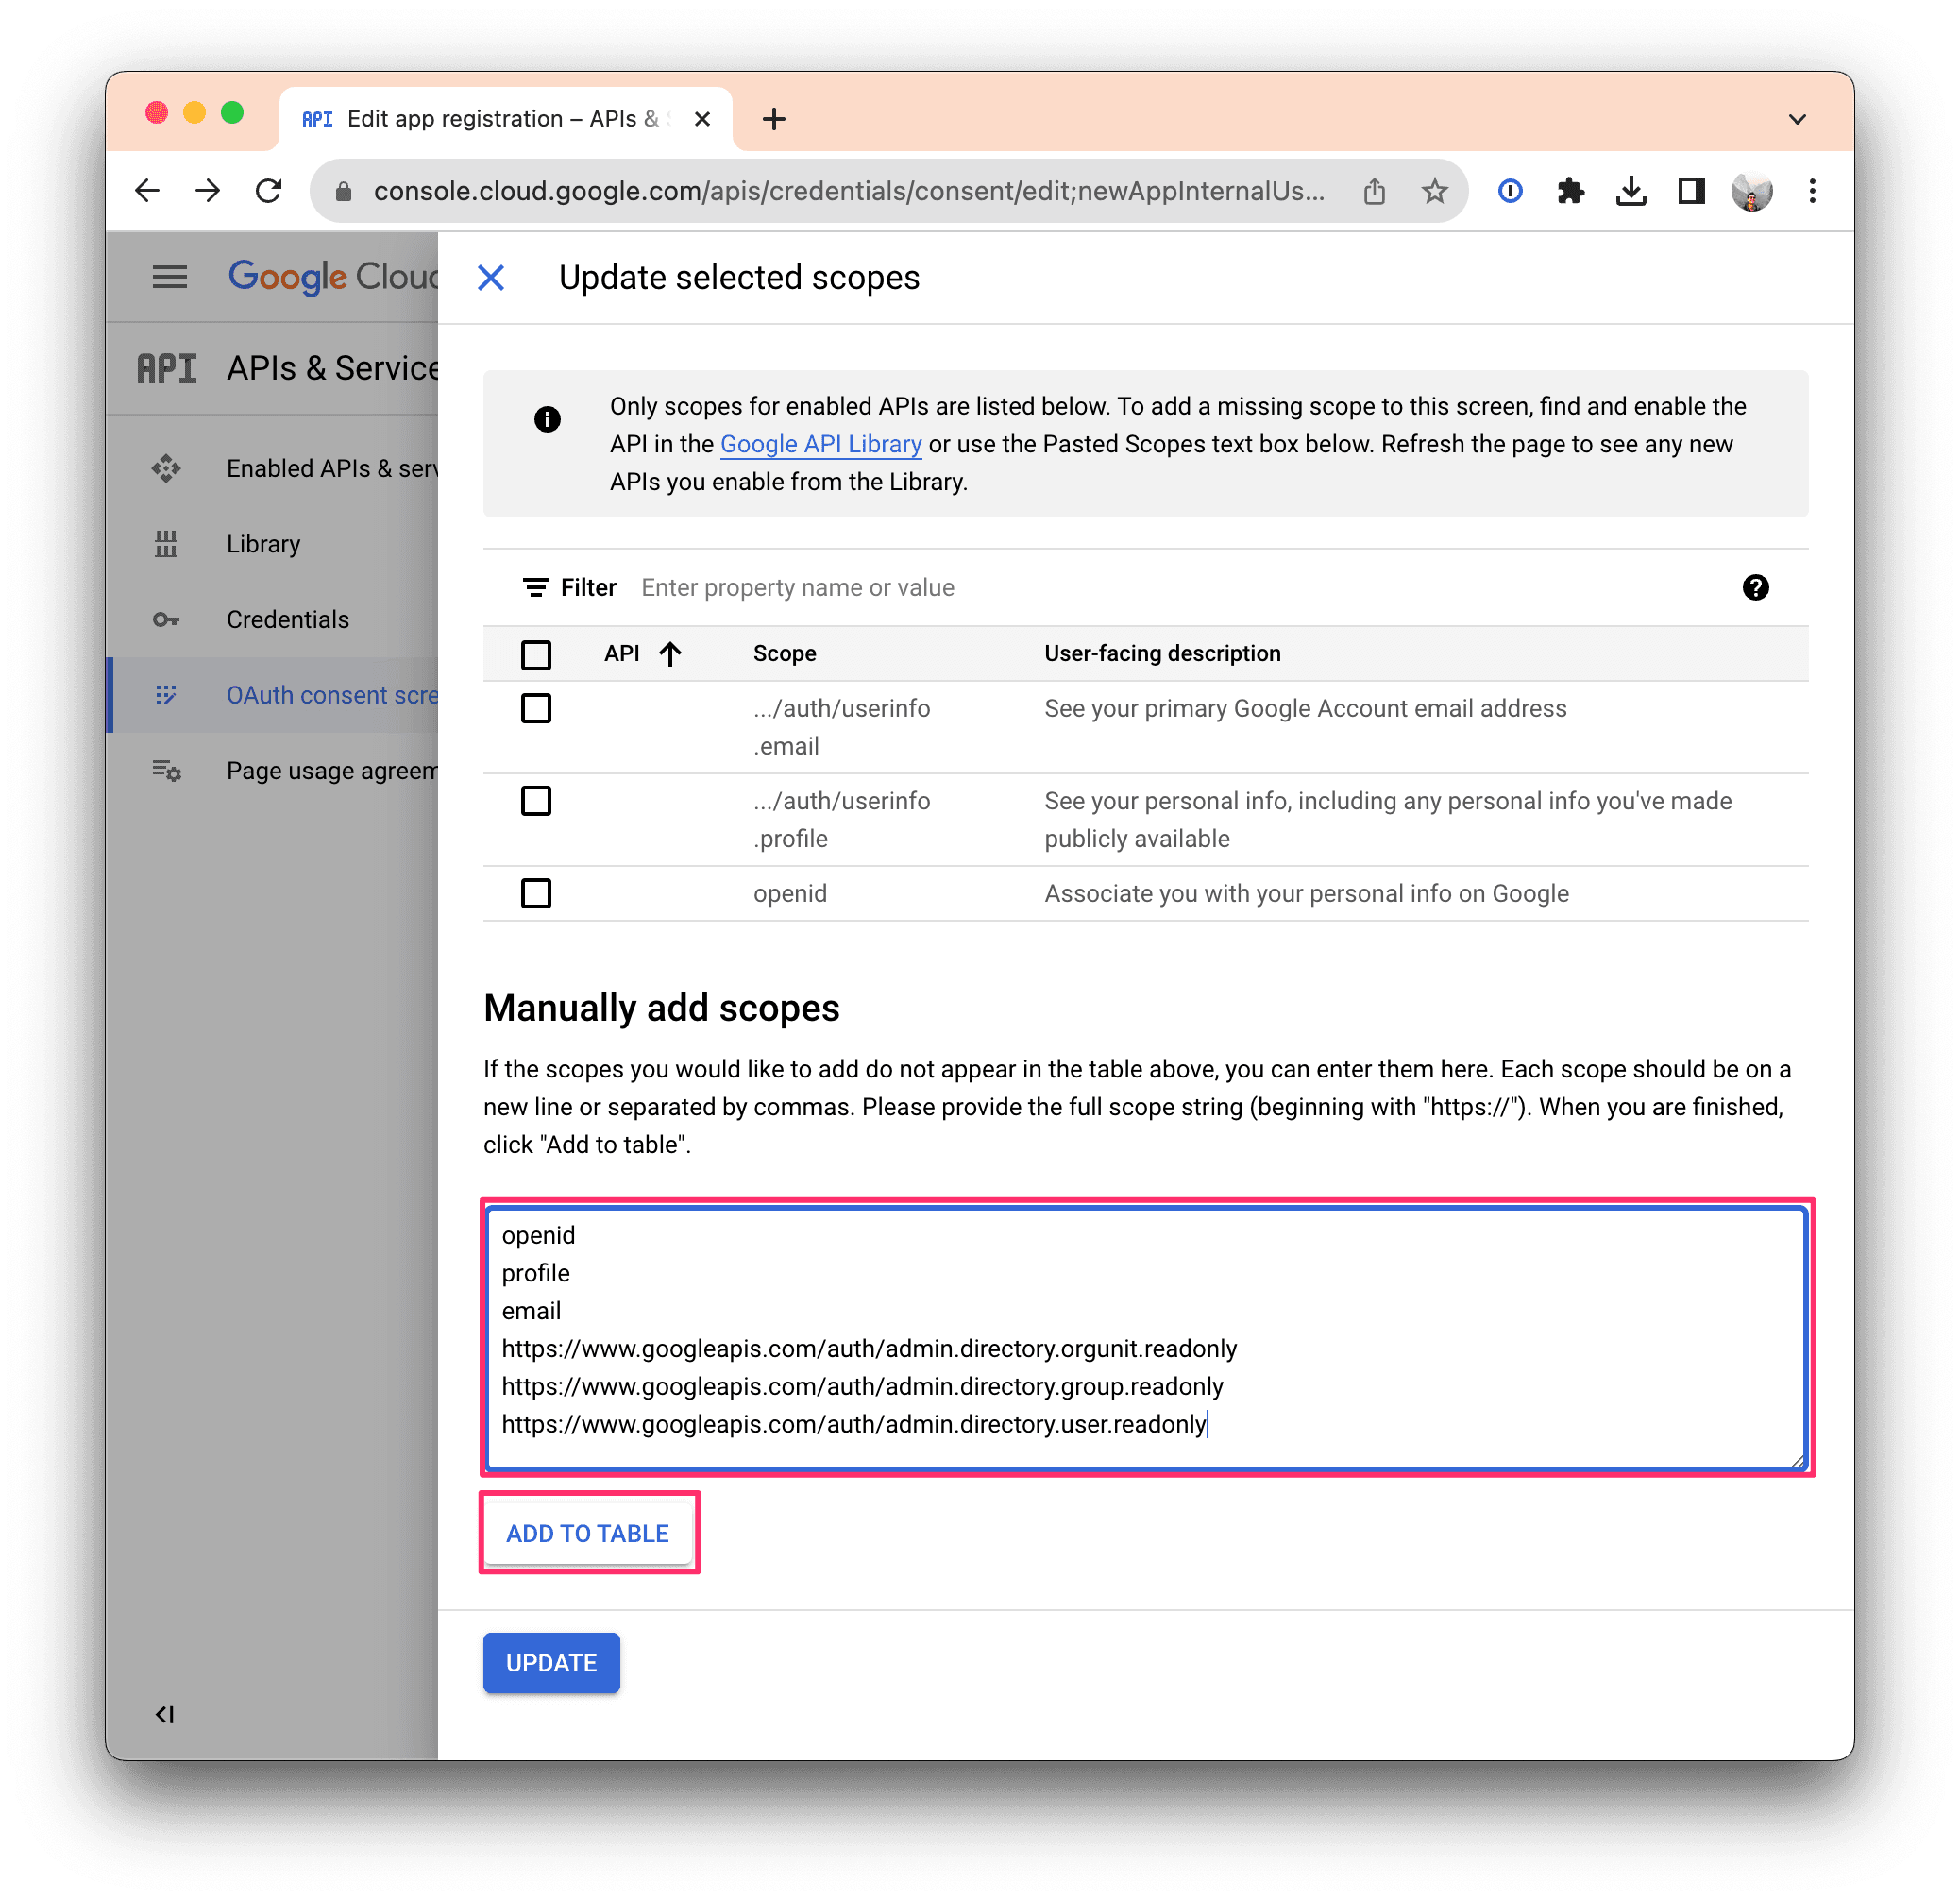
Click ADD OR REMOVE SCOPES and copy-paste the scopes below depending on your plan level into the Manually add scopes field.
Starter and Team plans
openid
profile
email
Enterprise plan scopes
openid
profile
email
https://www.googleapis.com/auth/admin.directory.orgunit.readonly
https://www.googleapis.com/auth/admin.directory.group.readonly
https://www.googleapis.com/auth/admin.directory.user.readonly
Then click UPDATE to make sure they're applied.
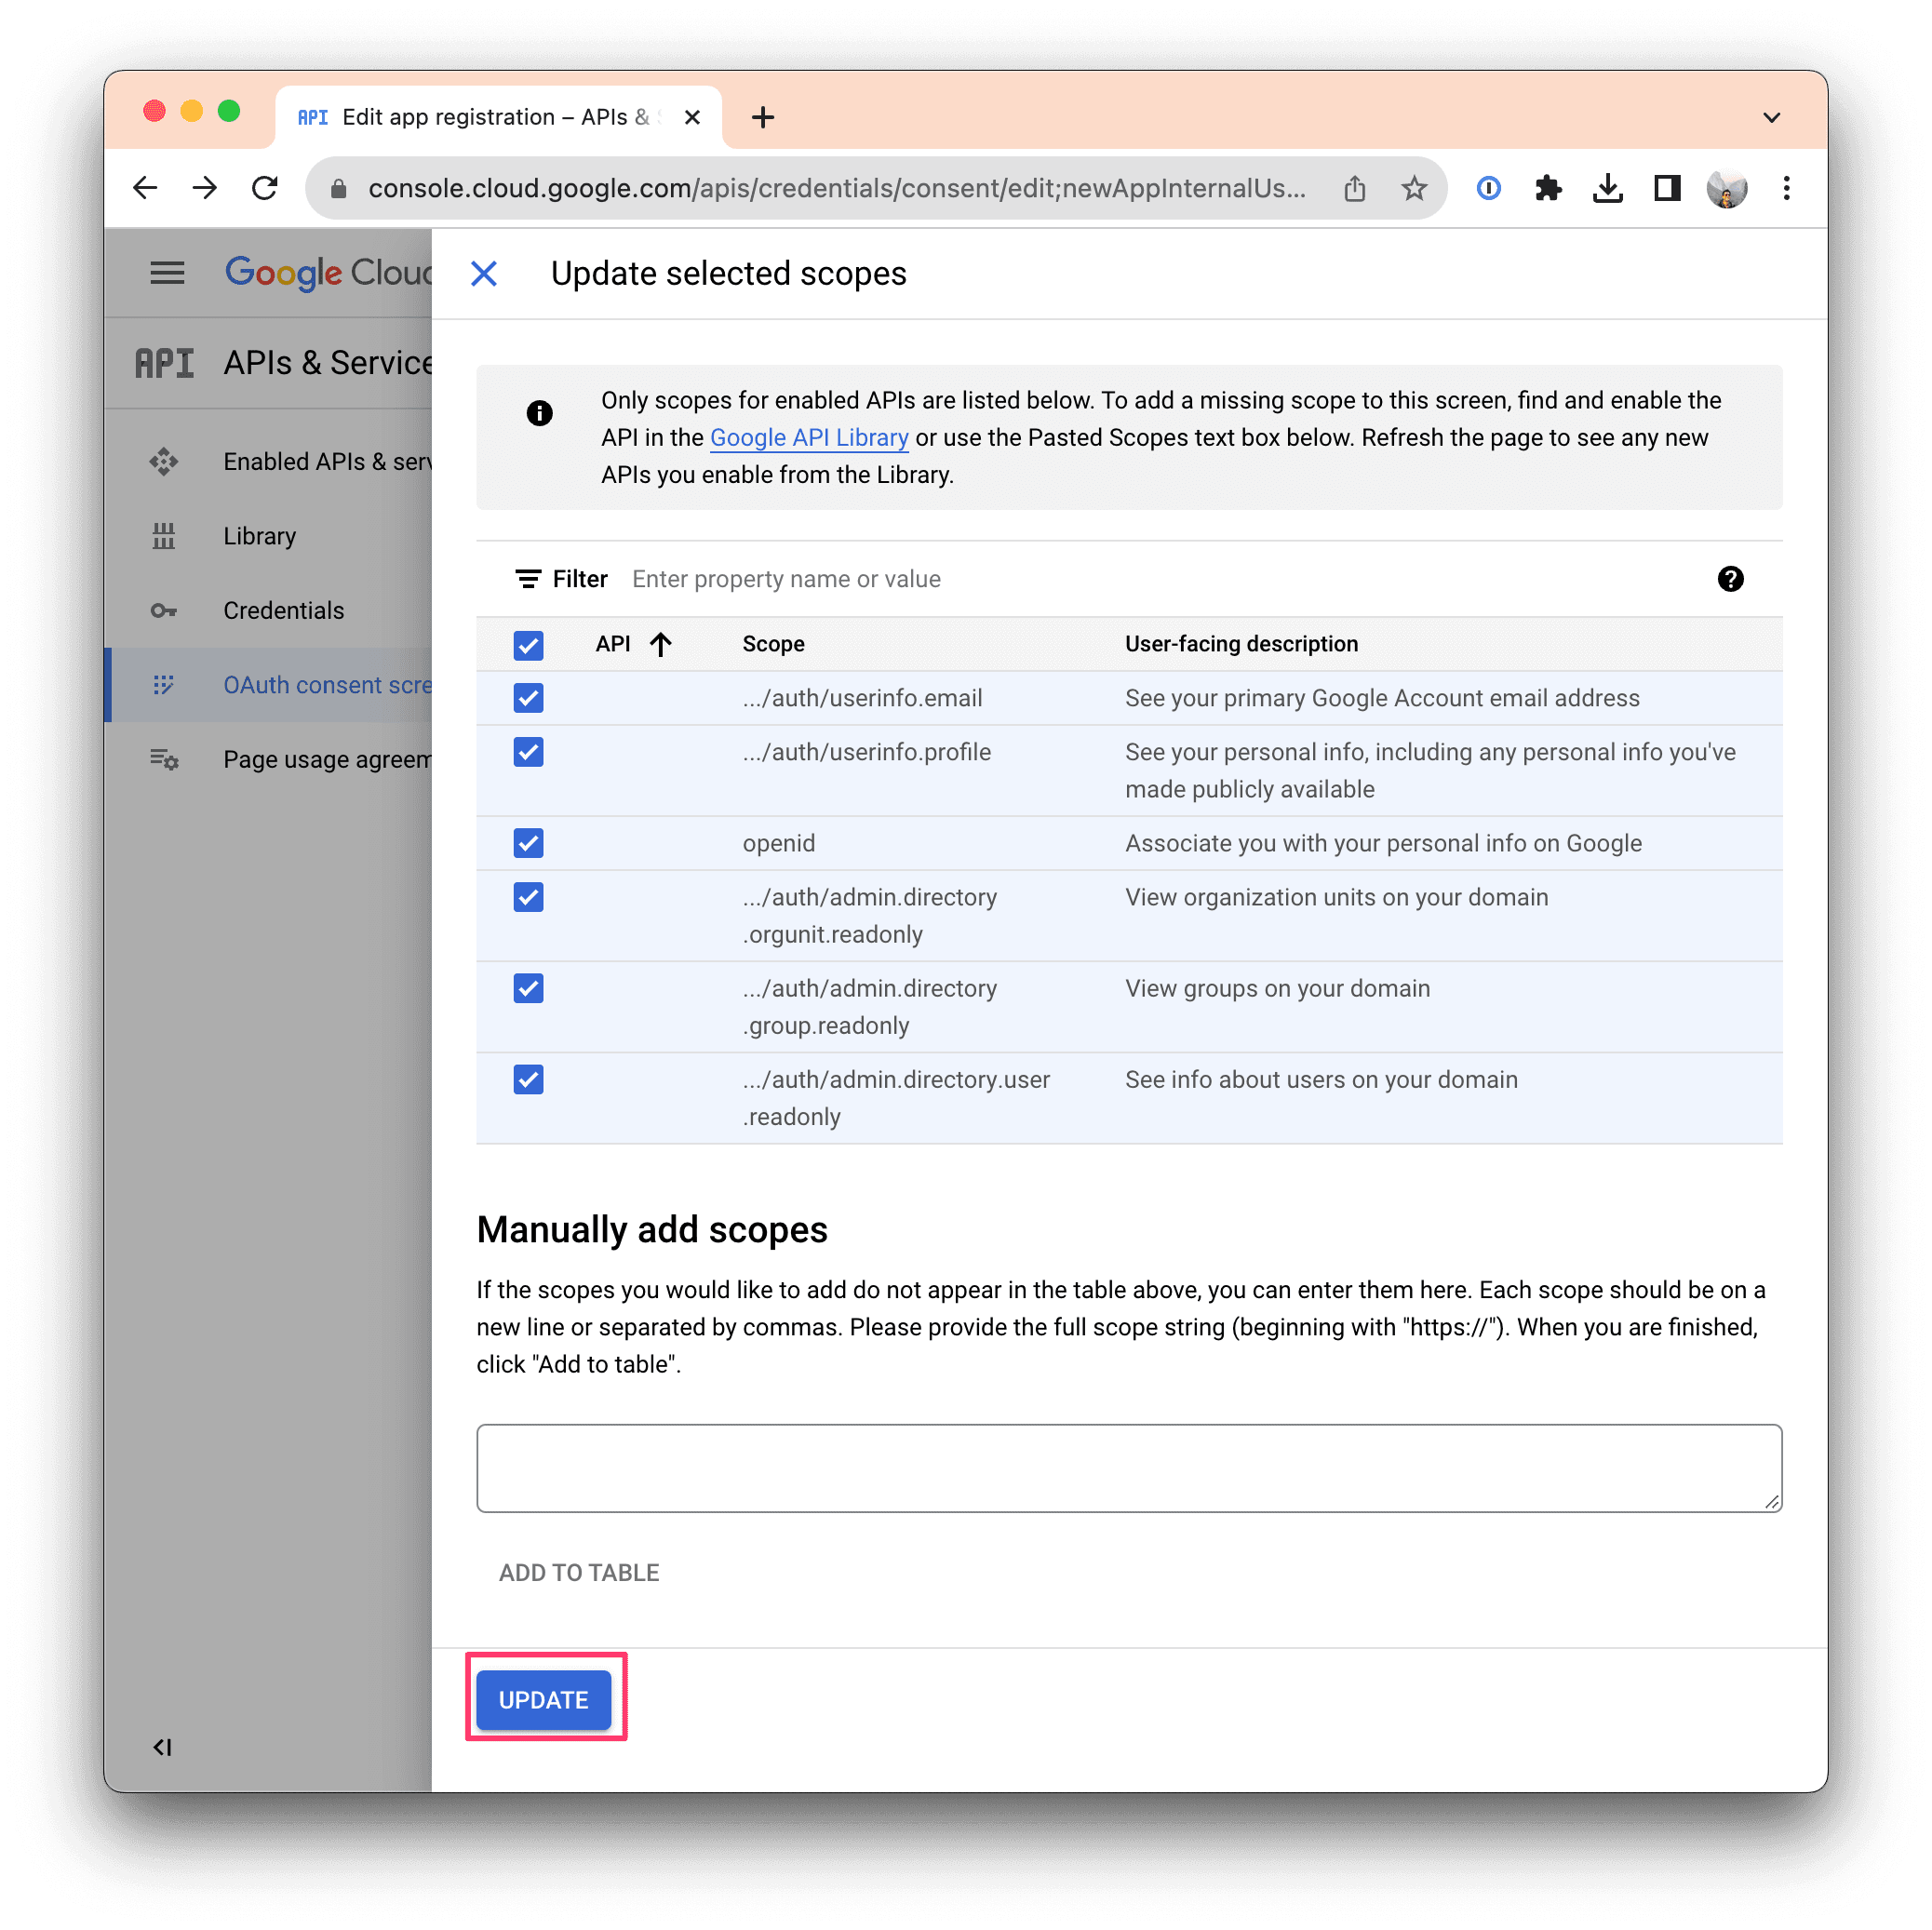
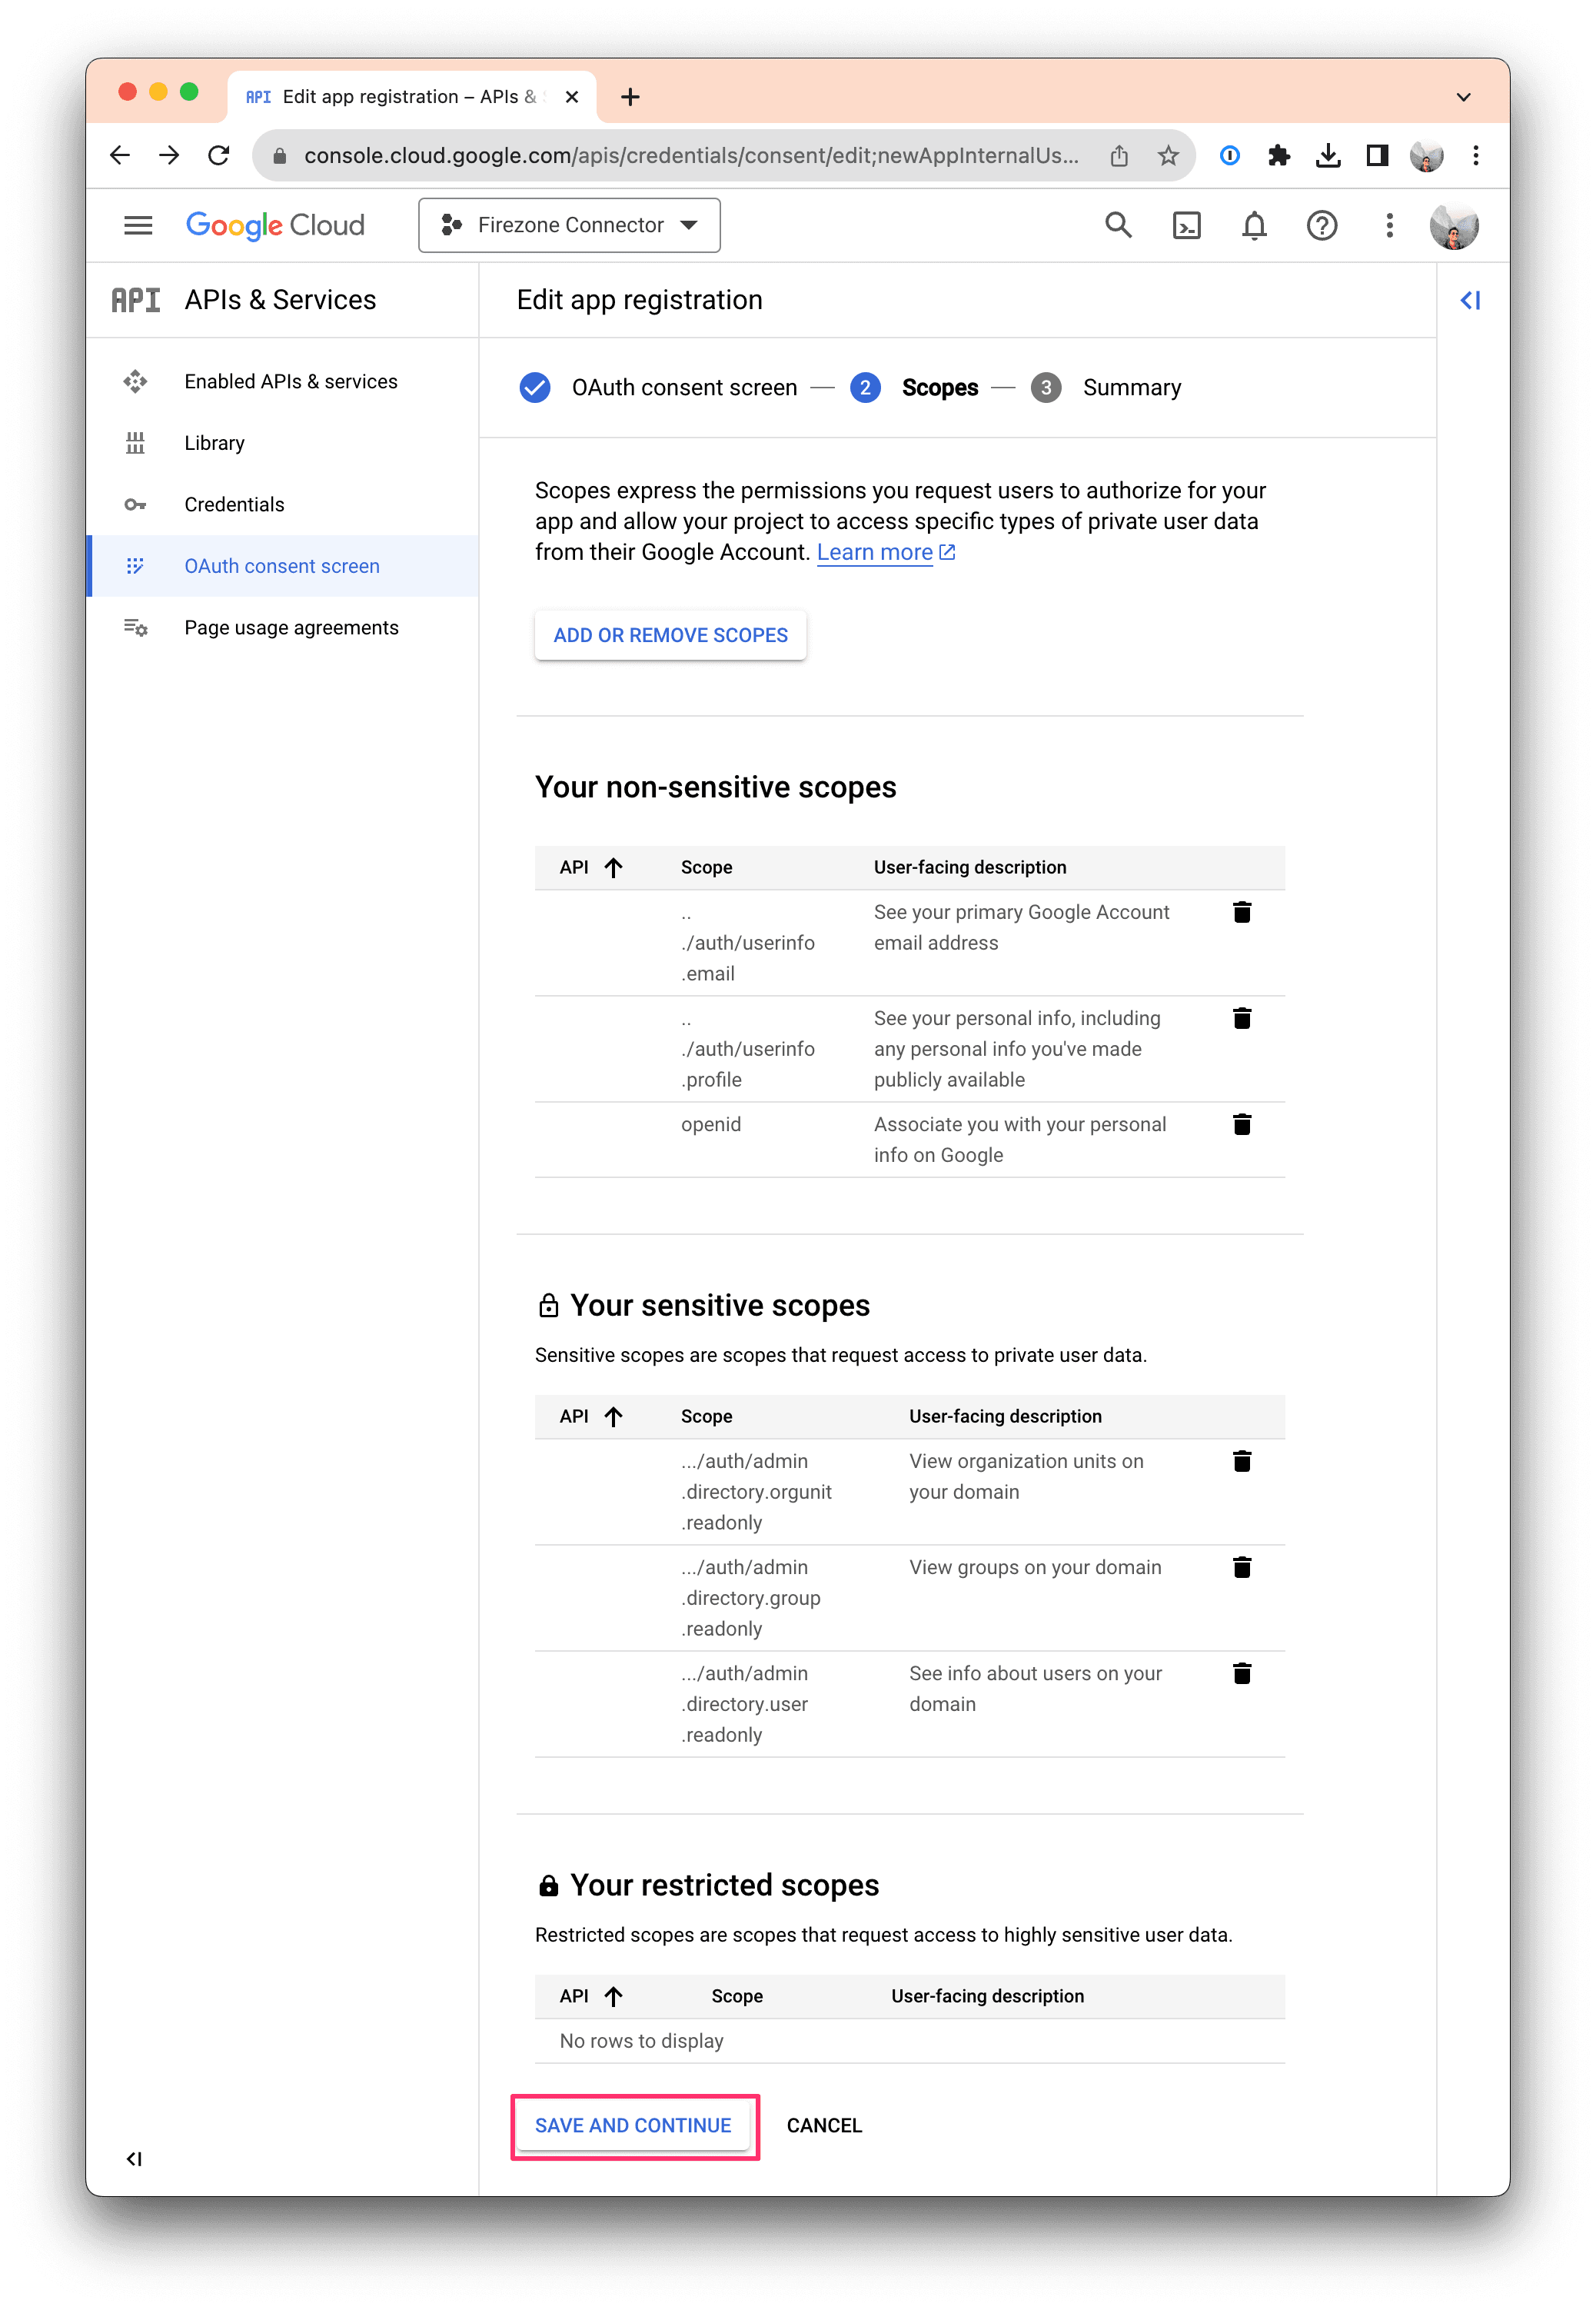
Ensure your Scopes configuration looks like the screenshot above, then click SAVE AND CONTINUE.
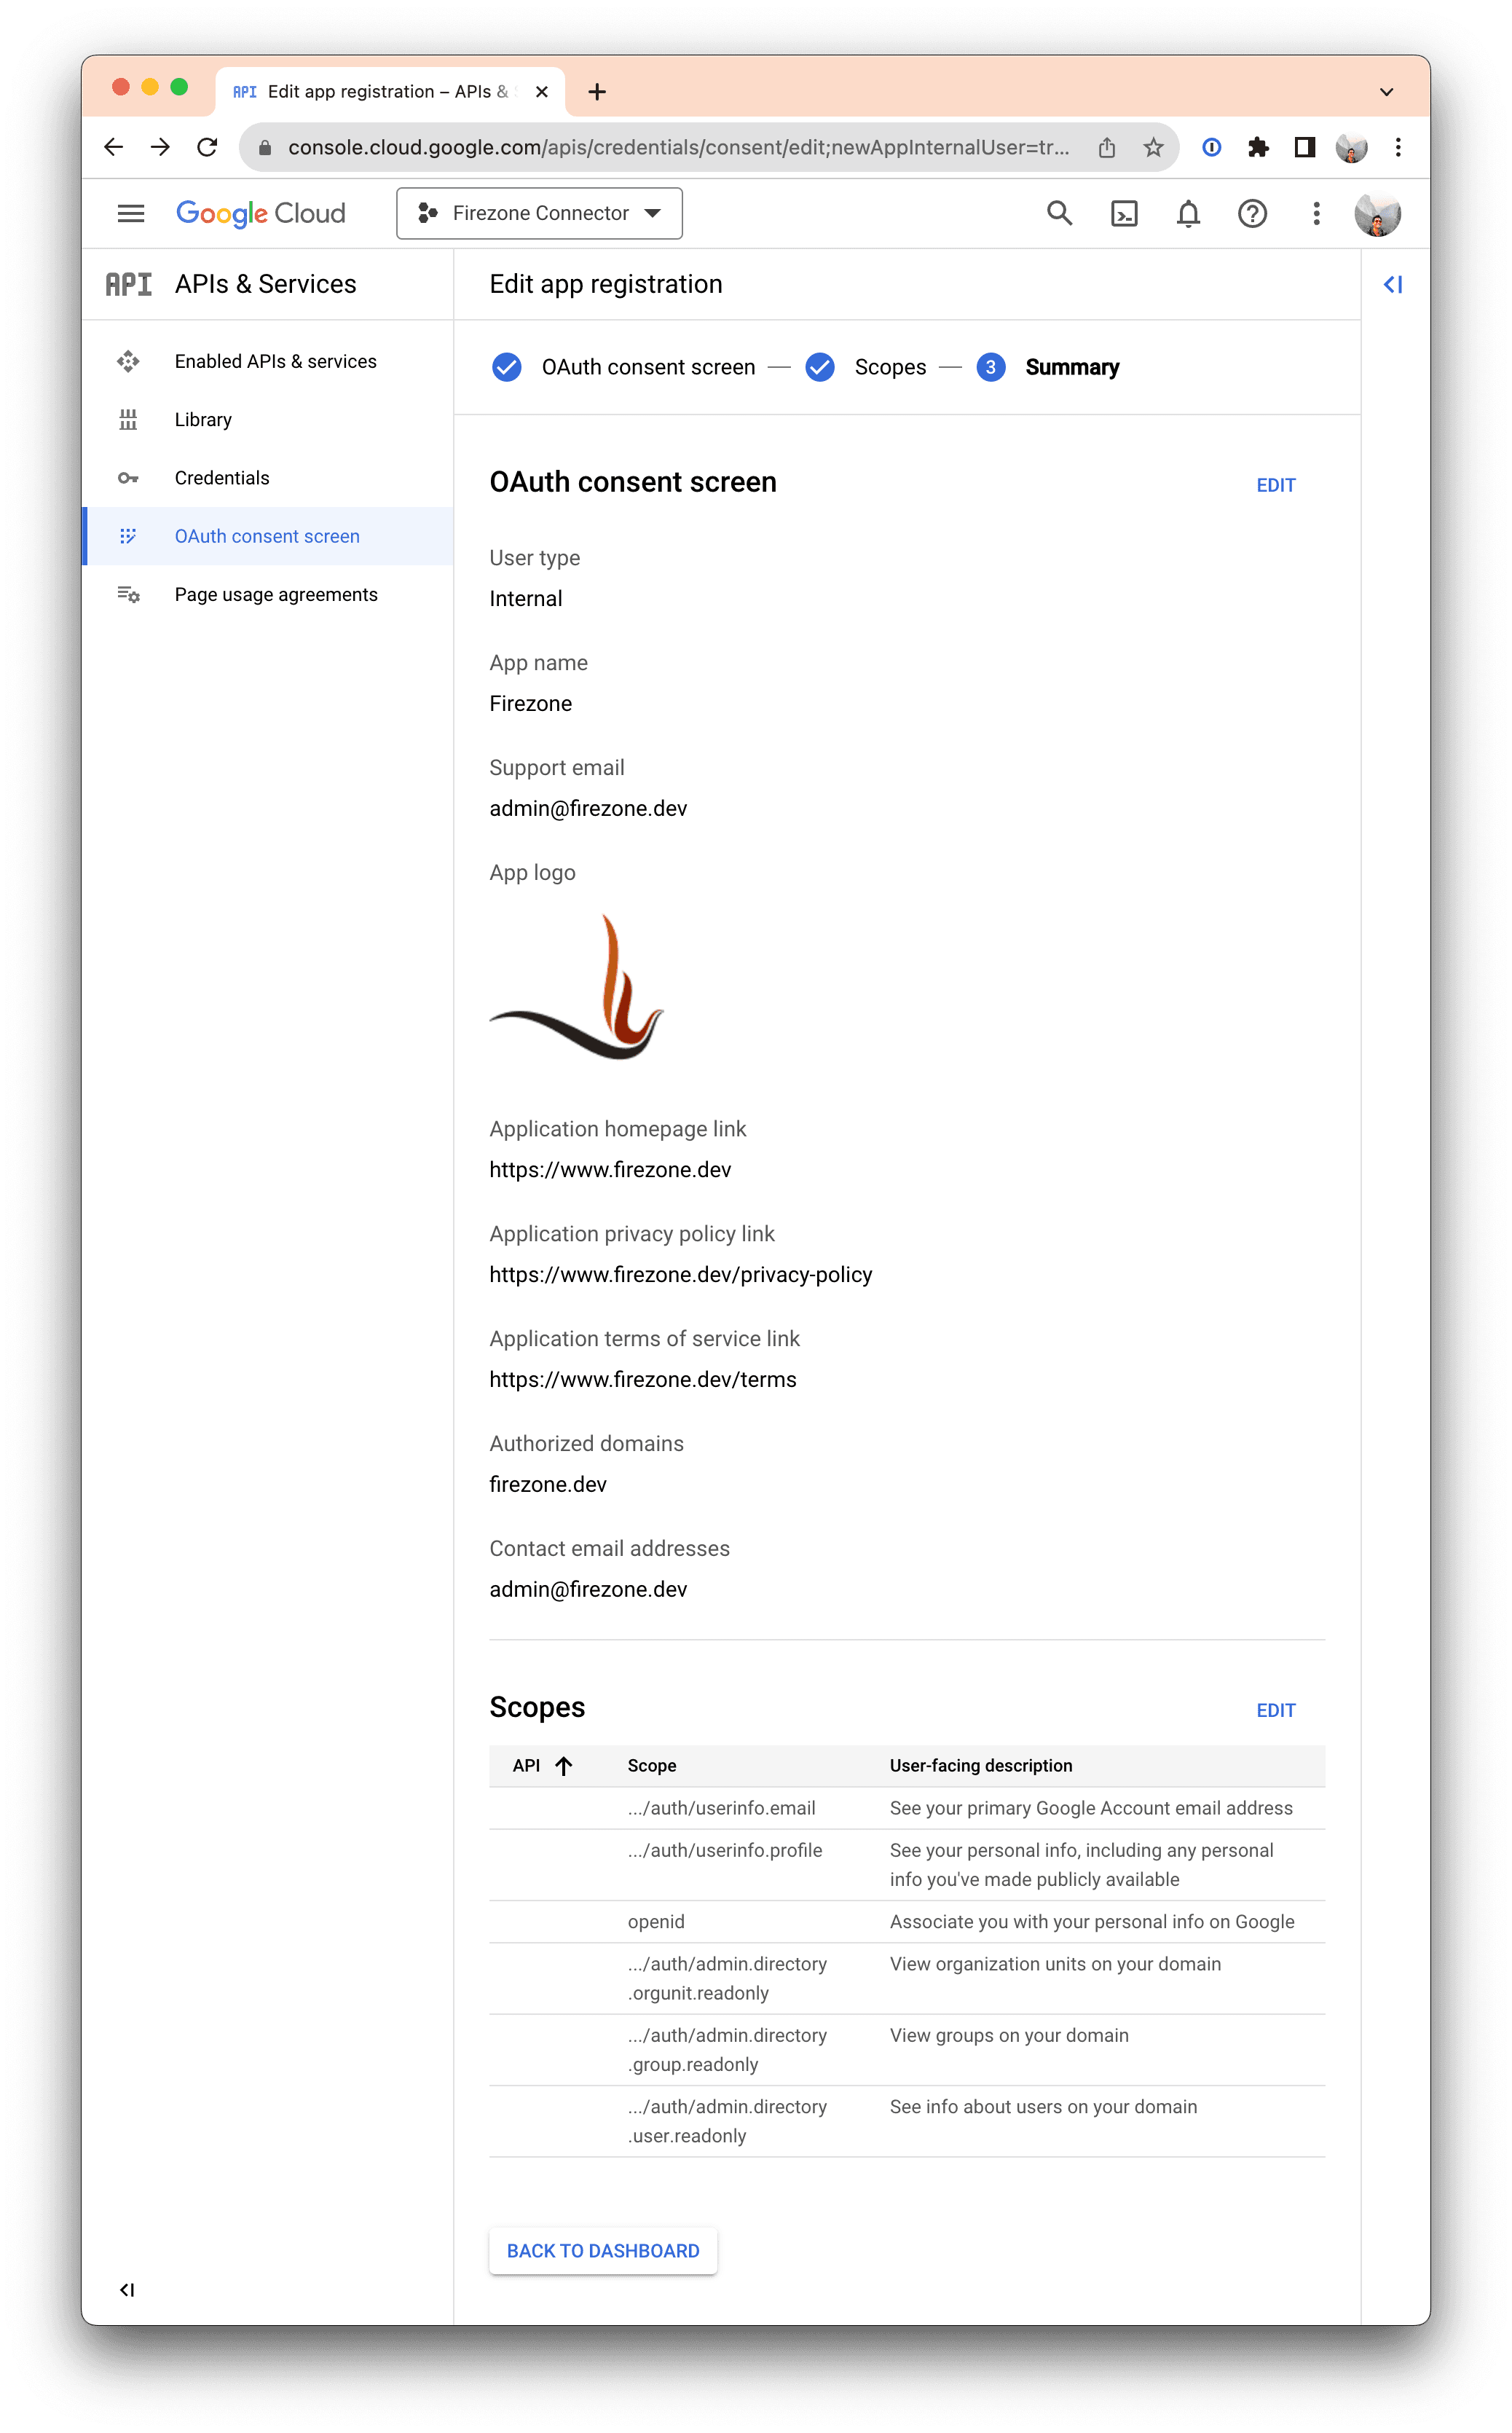
Your OAuth app summary should look similar to the screenshot above.
Step 5: Create client credentials
Next, you'll need to add OAuth credentials to allow Firezone to connect to your Google Workspace account.
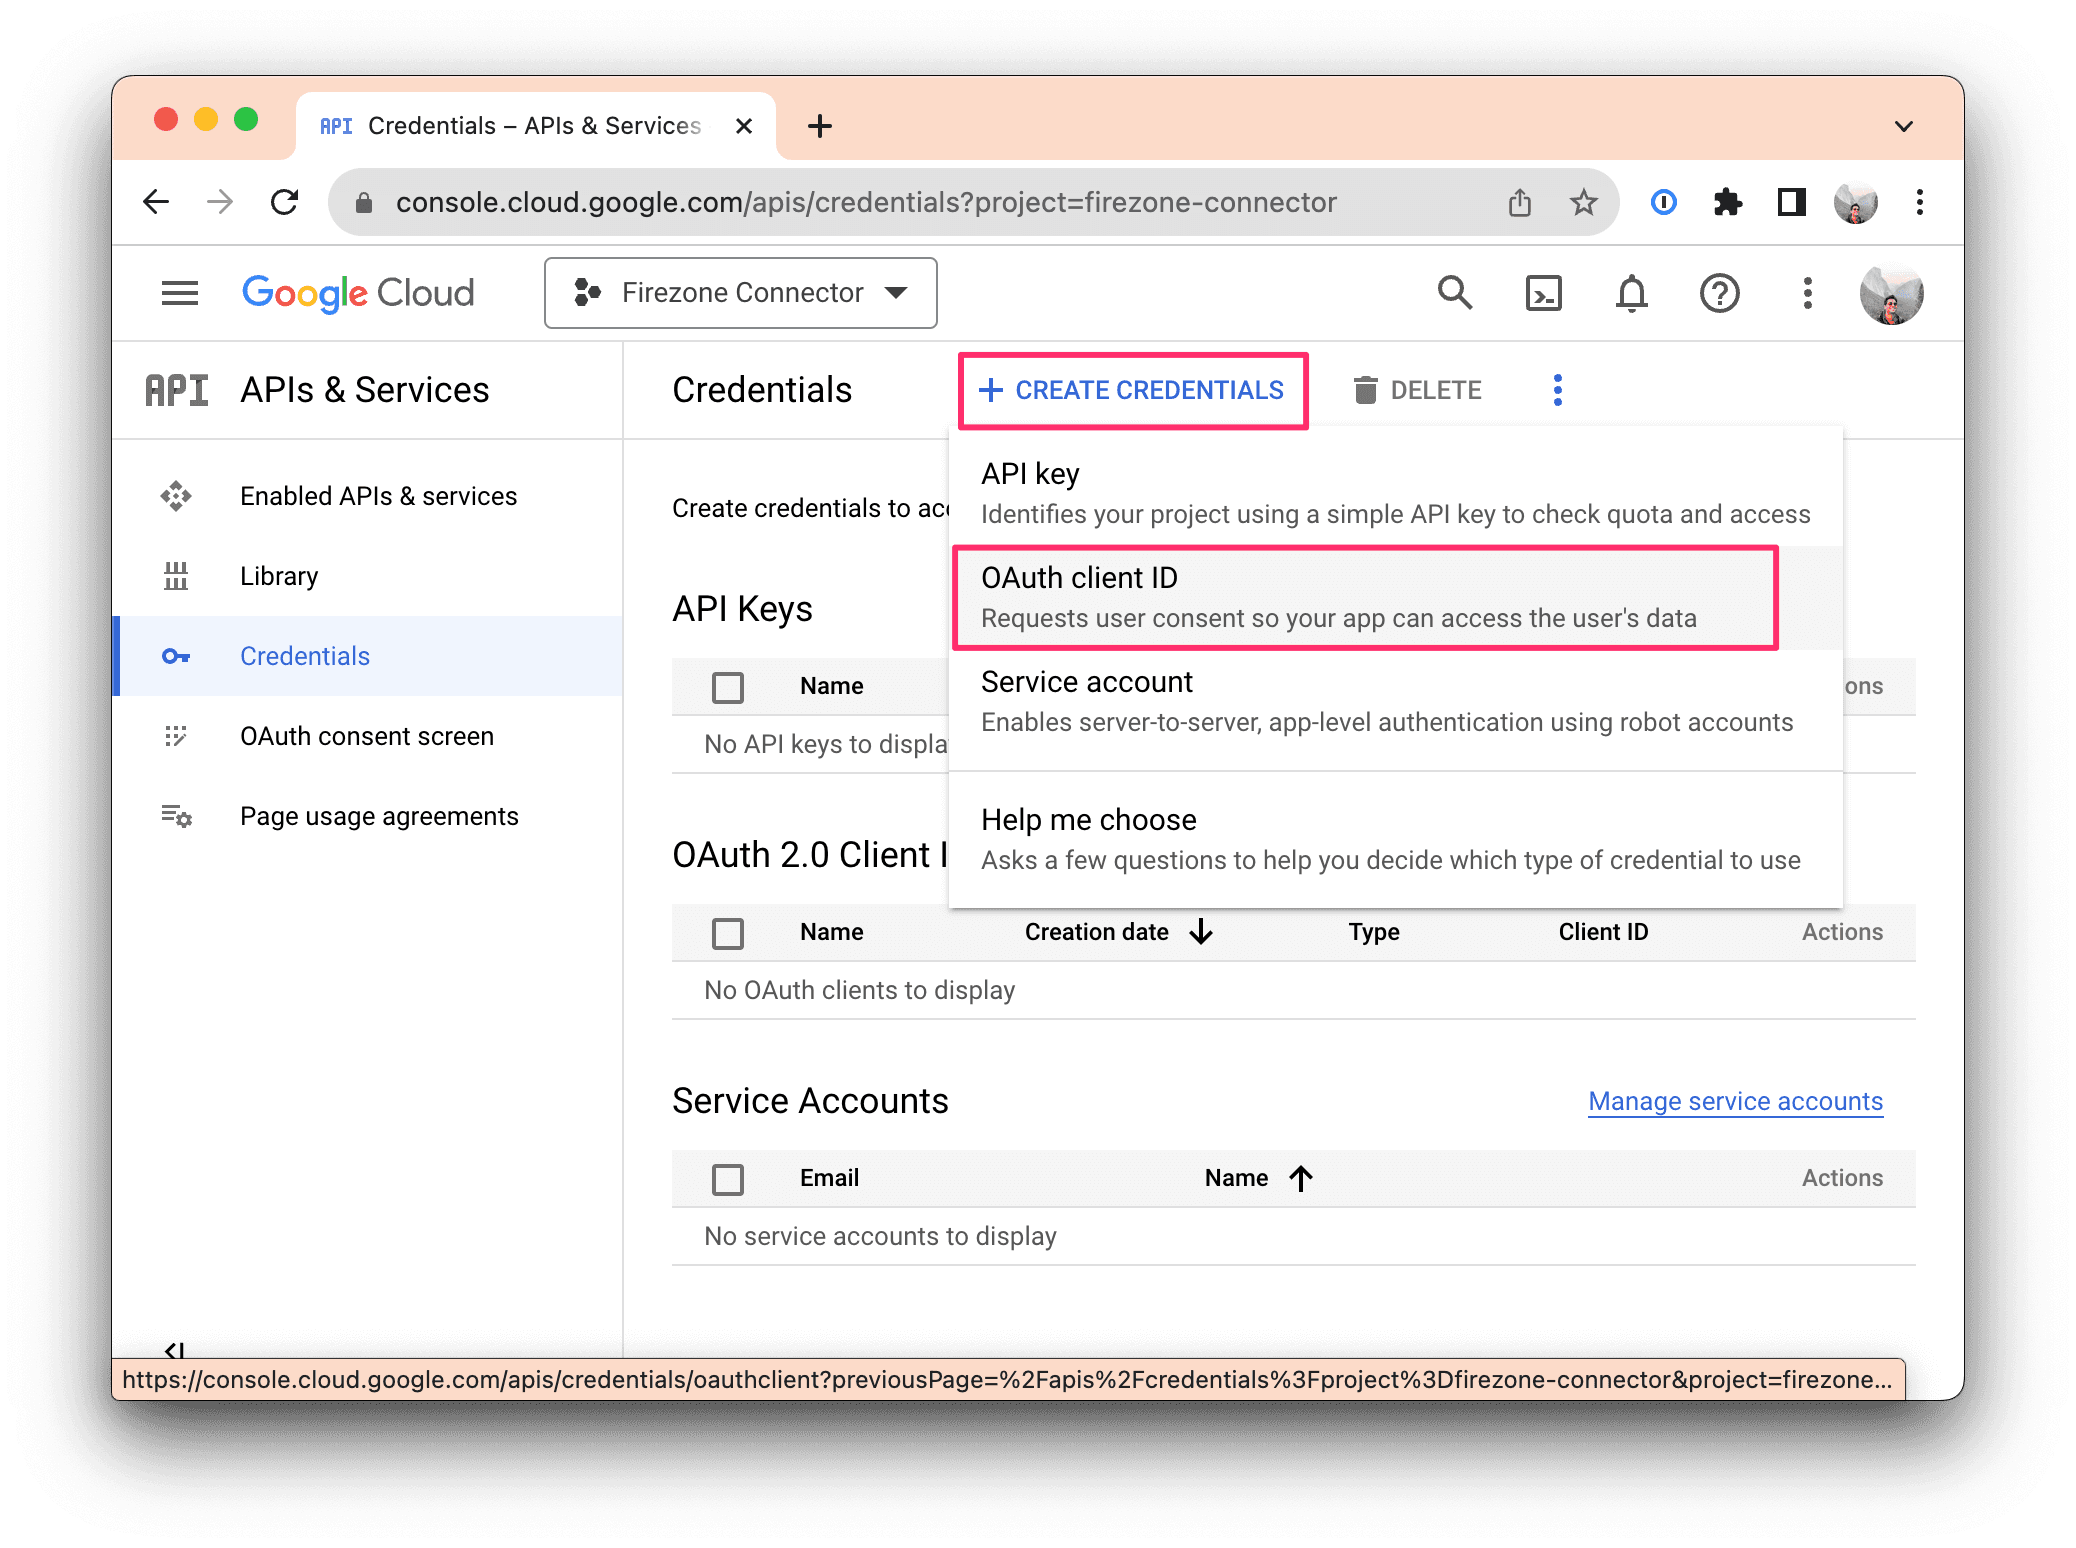
Head to the Credentials section and click CREATE CREDENTIALS to create new OAuth credentials. Be sure to select "OAuth client ID" in the dropdown menu.
On the next screen, select Web application, then use the following information for the remain fields:
- Name:
Firezone OAuth Client - Authorized redirect URIs: Click ADD URI, and enter the two redirect
URIs shown on the Google Workspace identity provider setup screen in your
Firezone admin dashboard
(
Settings -> Identity Providers -> Add Identity Provider -> Google Workspace -> Configure).
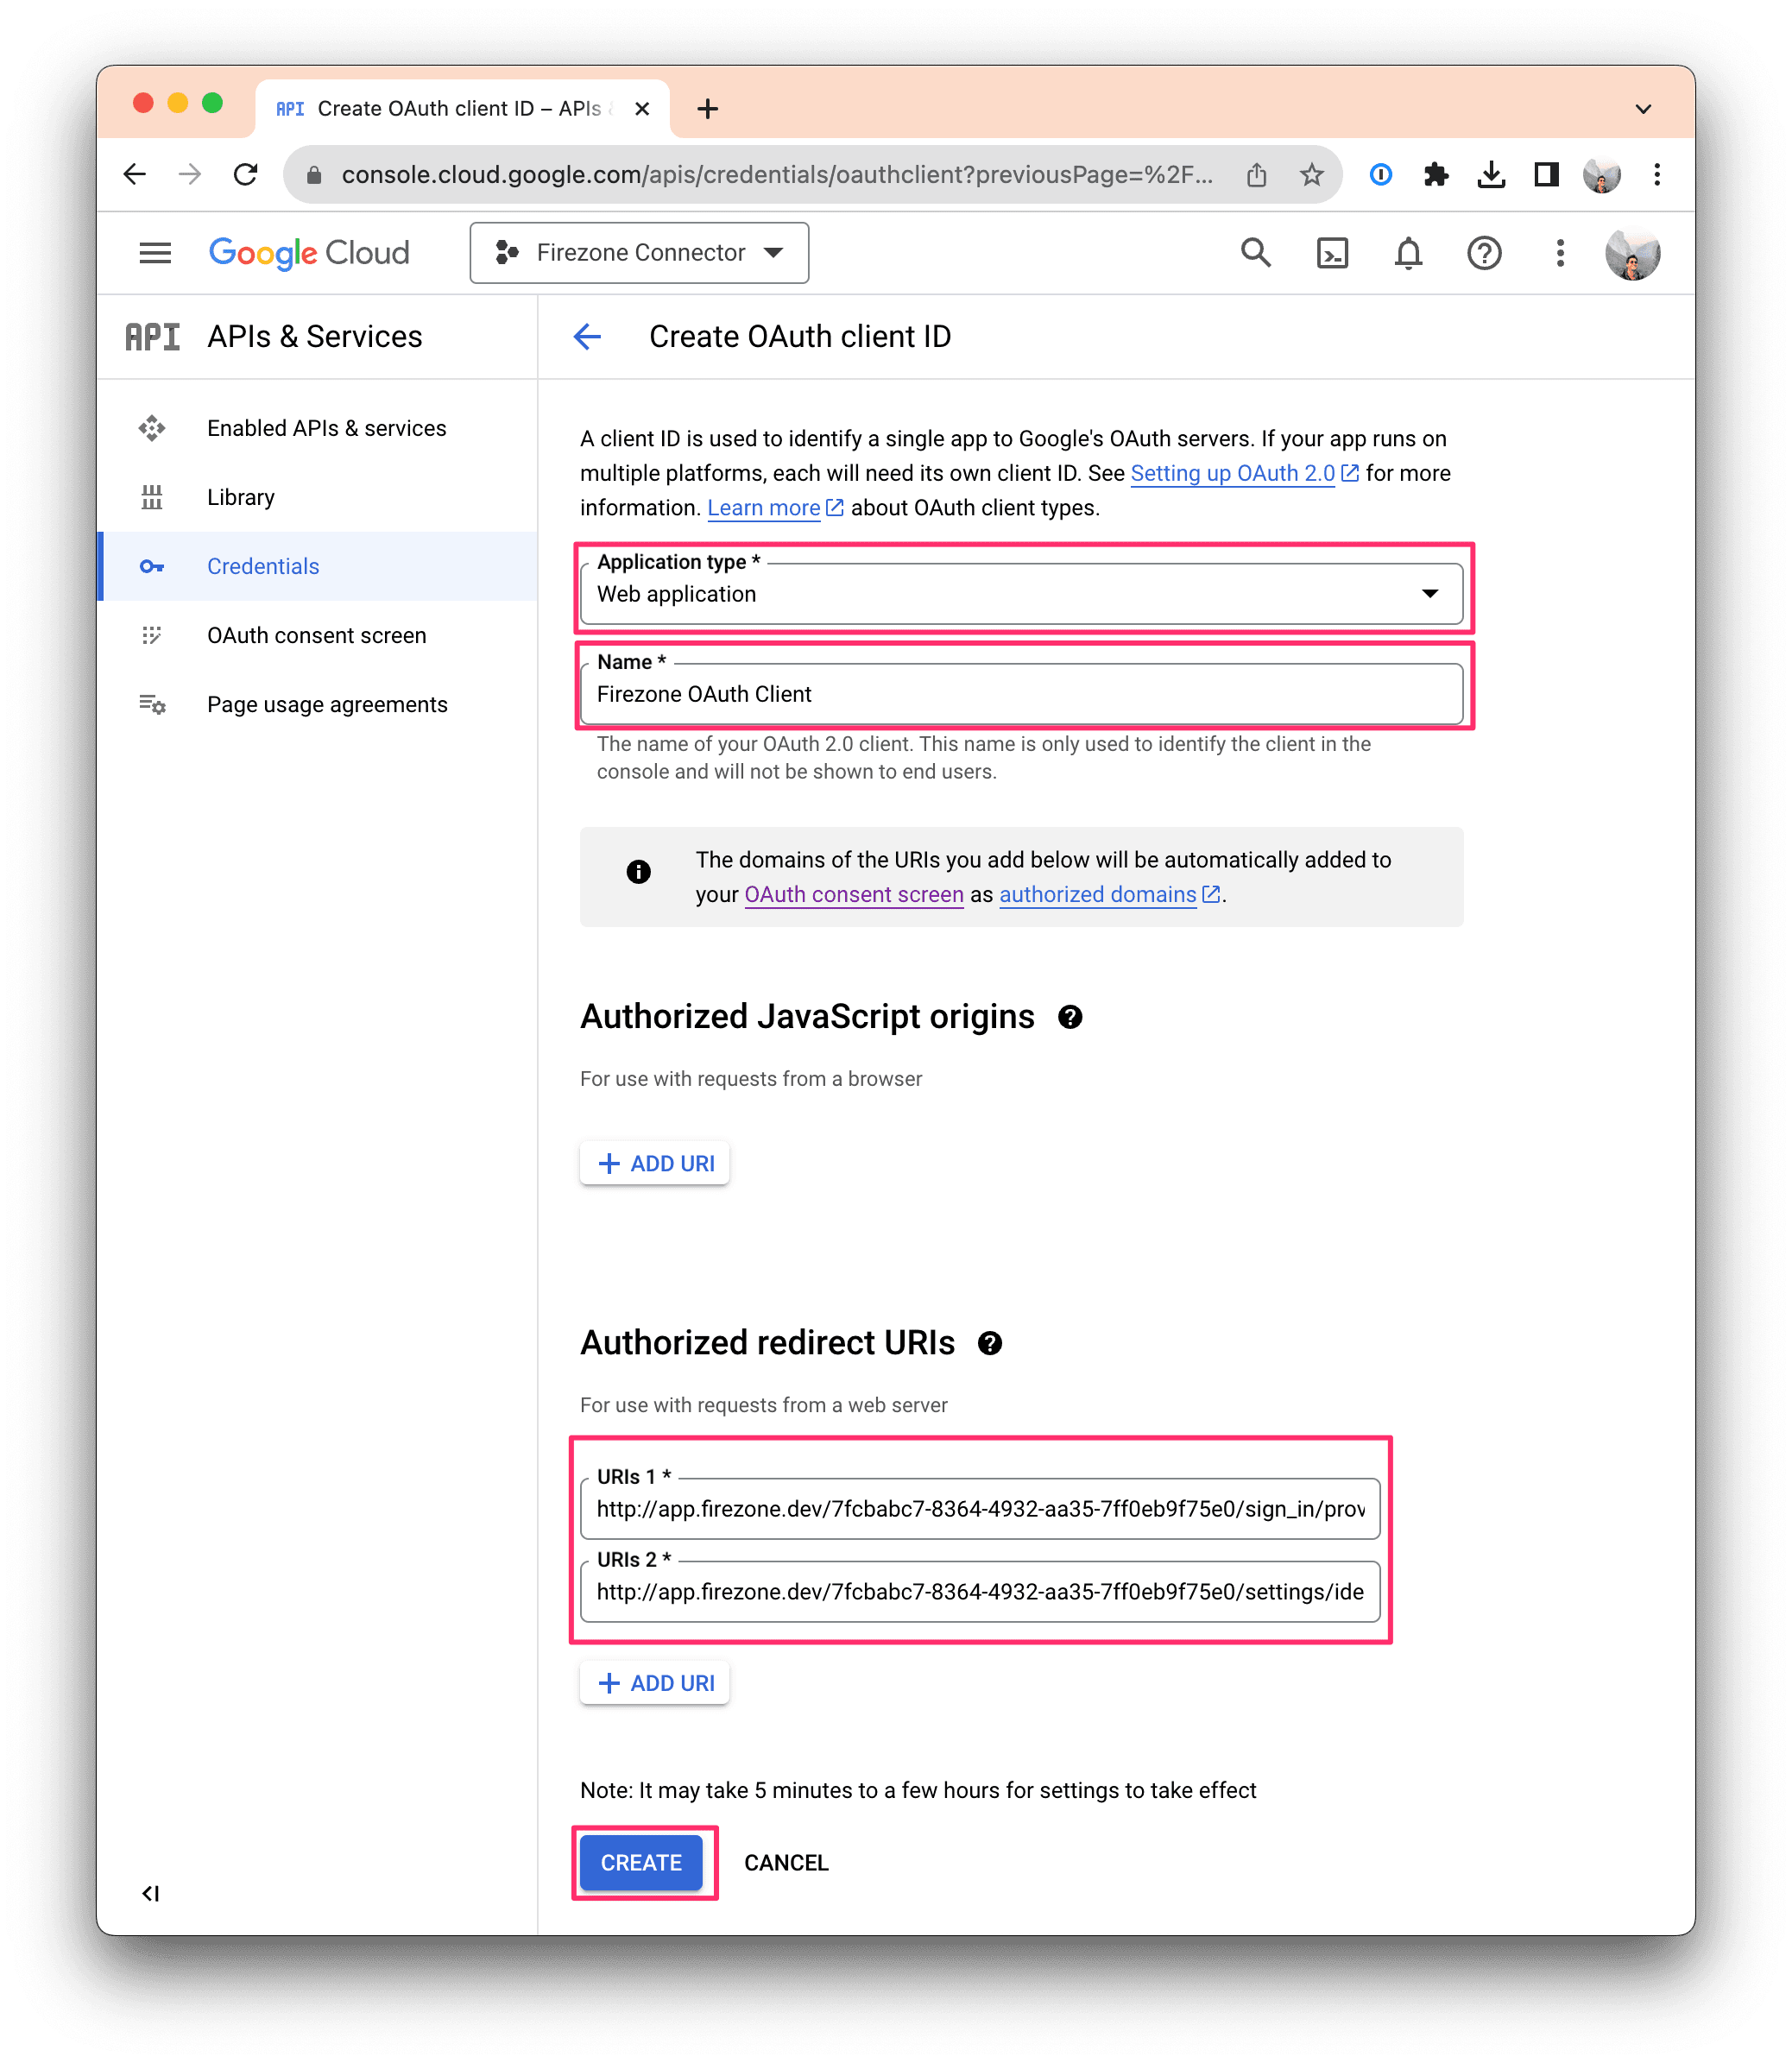
Click CREATE.
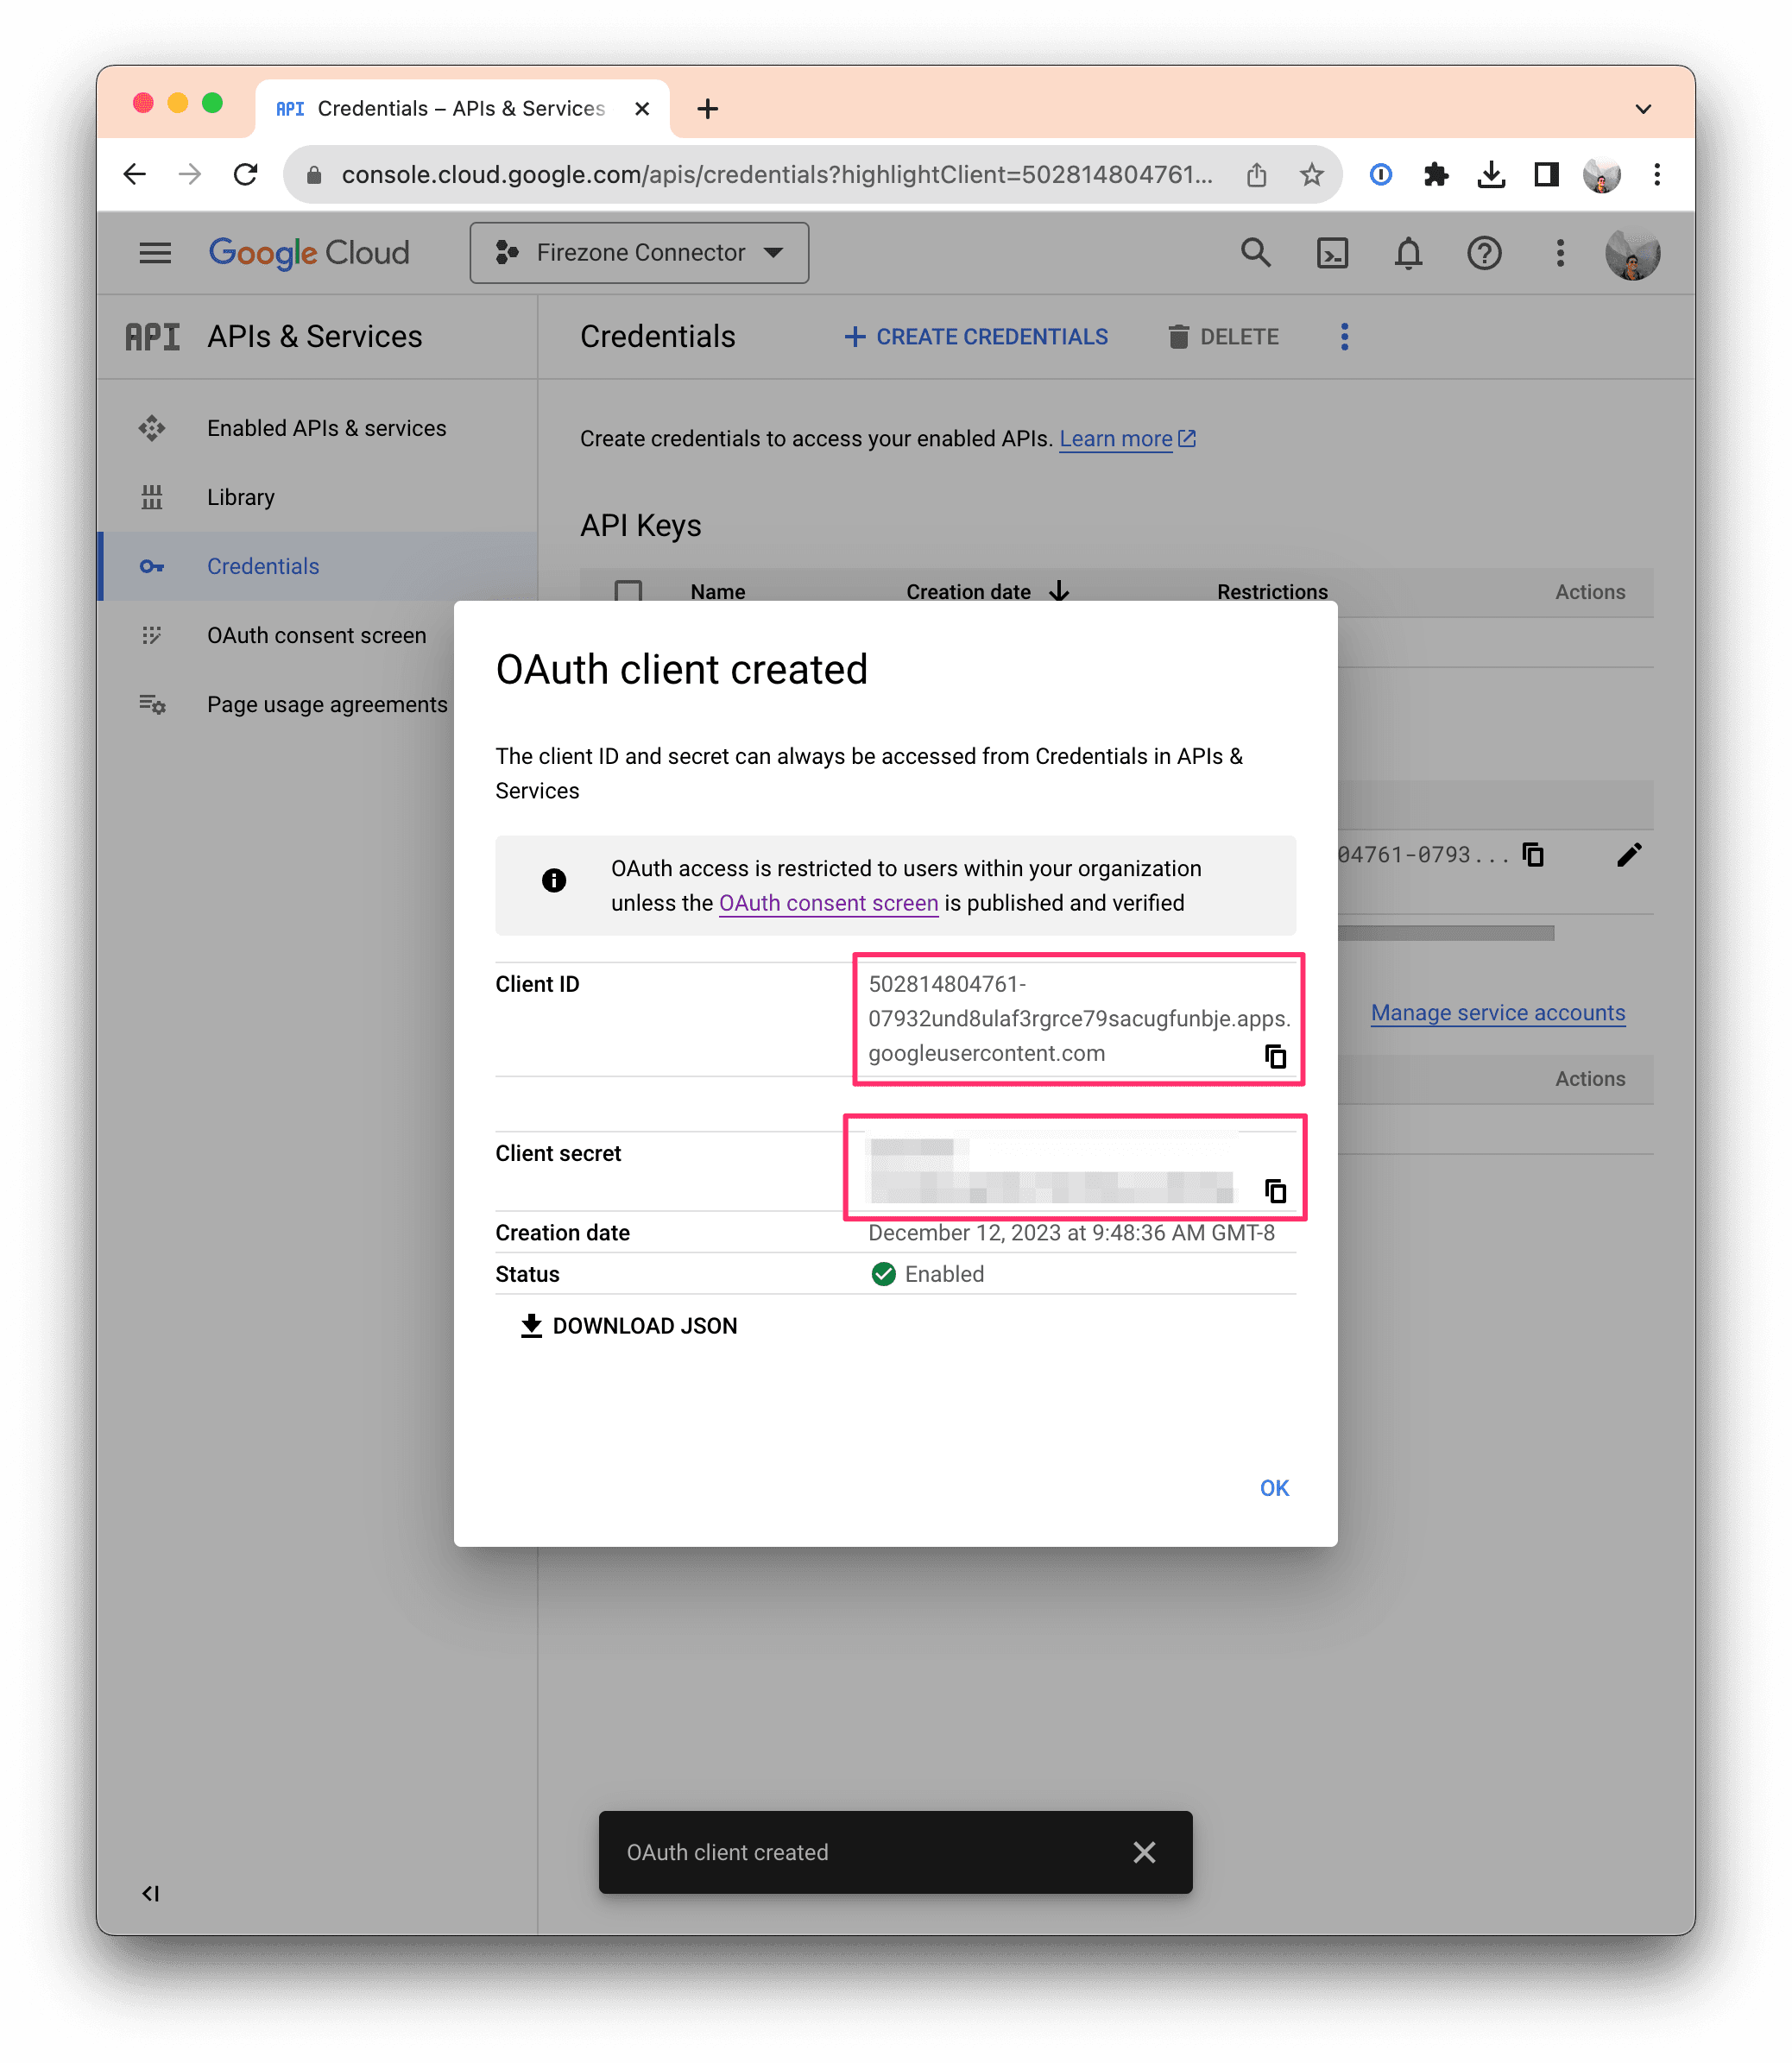
Important: Make sure to save the Client ID and Client secret fields in a
safe place as they won't be shown again.
Step 6: Configure Firezone
Go back to the Firezone admin dashboard, and enter the Client ID and
Client secret you copied from the previous step in the appropriate fields in
"Create Identity Provider" form.
Finally, click Connect Identity Provider and click Allow when Google prompts you.
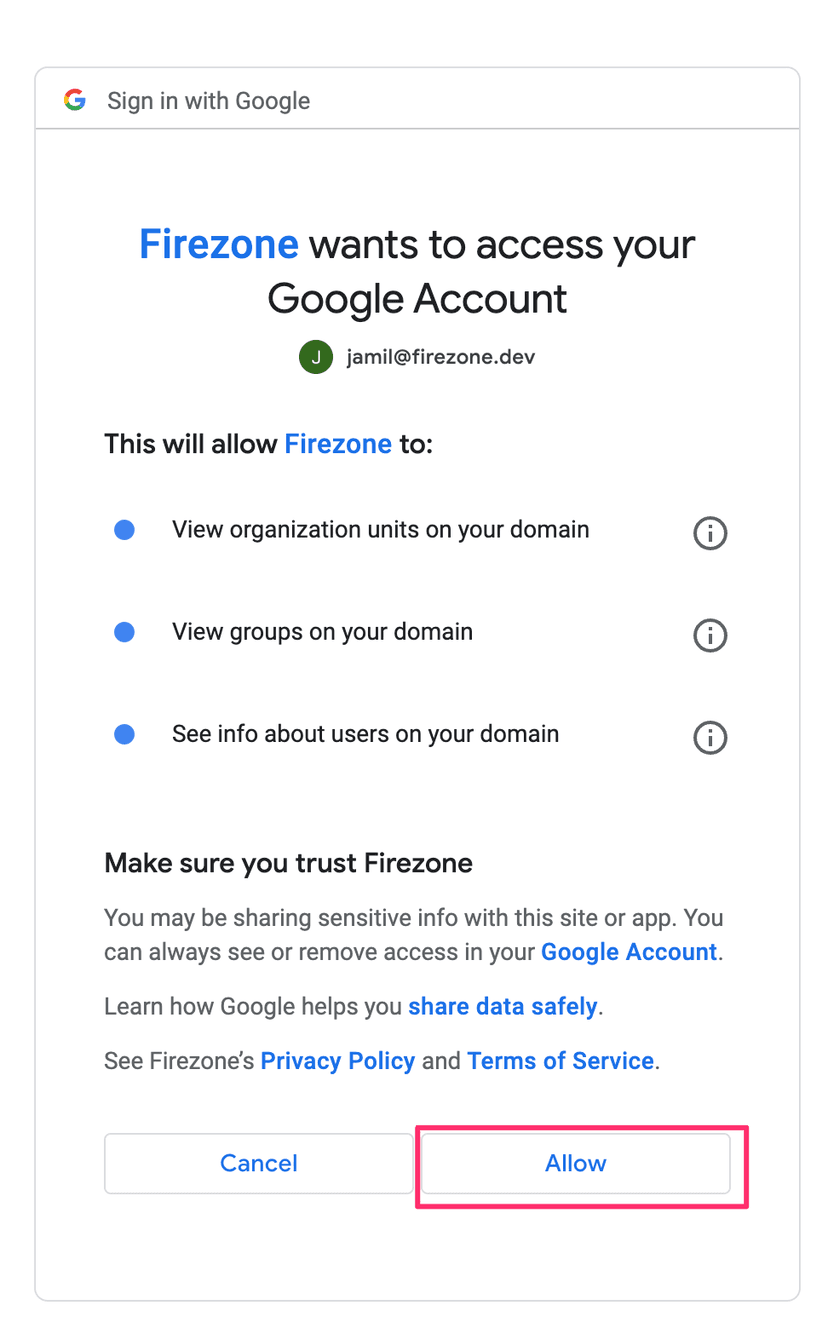
If you get successfully redirected back to your Firezone admin dashboard, you're done! Your Google Workspace connector is now successfully configured. If directory sync is enabled, the first sync will occur within about 10 minutes. After that, users will be able to authenticate to Firezone using their Google Workspace accounts.